
CASD
COMPUTER-ASSISTED
SMILE DESIGN
ABSTRACT
The recent introduction of computer-driven treatment plan protocols and systems has sparked interest in technologies that make it possible for smiles to be designed in the early states of treatment planning and treatment presentation.
The advantages are numerous and they include:
(1) Improved understanding and visualization of the final results,
(2) Improved interdisciplinary collaboration,
(3) Improved communication between clinician and patient,
(4) Improved communication between clinician and dental laboratory/technician,
(5) Elimination or reduction of unwanted results, and
(6) Elimination or reduction of costly remakes, just to name a few.
Just as a house needs a complete set of blueprints to be built, a partial or complete oral rehabilitation ad particularly those involving the esthetic zone1 also require a set of blueprints to ensure the actual result will match the intended one.
Many systems and protocols have been introduced recently. These represent an improvement over existing strategies employed in case planning and treatment presentation. The author presents his approach using design-specific software and offers an alternative way to obtain a final blueprint for smile design.
INTRODUCTION
It is the author’s opinion that Digital Design does not constitute proper terminology in accordance with established nomenclature rules given the word digital 2,3 refers at its linguistic roots to any system or device that operates with a binary set of instructions or an operating system that relies on binary code. Most, if not all, electronic devices today rely on some form of internal controller or processor that operates with binary code and binary language. For this reason the definition Digital Design and all its derivatives that relate to smile design become vague and non-specific. The more generic term CAD or CAD-CAM has been extensively used for a variety of different applications as it refers to Computer-Aided Design and Computer-Aided Manufacturing. The author prefers to use the term Computer-Assisted Smile Design since this term clearly defines the design and/or manufacturing are computer-based and computer-dependent.
Despite its inappropriate use the word digital as it has been used to define or describe smile design protocols may remain as the result of a time-honored tradition or time-honored practice to become an established and universally accepted dental term. Time will tell whether dentistry will choose to honor proper nomenclature standards or adhere to already established terms.
A review of its historical roots shows the term CAD 4 is believed to have been coined by Douglas T. Ross in 1951 when he first observed a computer perform the mathematical process of forming a shape with a digital machine tool. A computer scientist and the found of SoftTech Inc. he is considered the father of APT (Automatically Programmed Tools), a language used to drive numerically controlled manufacturing.
The term CAM 5,6,7 initially emerged in large companies and particularly in the automotive and aerospace industries. French engineer Pierre Étienne Bézier is credited with the development of CAD-CAM application UNISURF in the 1960s for car body design and tooling while working for French car manufacturer Renault. He is considered one of the founders of the field of solid, geometric and physical modeling as well as the field of curves’ representation specially in CAD-CAM systems. He became a leader and pioneer with the use of mathematics and computing tools to completely transform design and manufacturing into computer-aided design and three-dimensional modeling. Bézier patented and popularized the now famous Bézier Curves and Bézier Surfaces used today by most computer design applications and computer graphics systems. Most, if not all, computer applications and software rely on Bézier Curves to describe the outlines of teeth when smile designs are created. Curves used to create smile contours and smile designs in software such as Apple Keynote, Microsoft Powerpoint, Adobe Photoshop, Adobe InDesign, Adobe Illustrator and many others, all rely on vector-based Bézier curves technology.
HISTORICAL PERSPECTIVE
Historically efforts to improve one’s smile and enhance the appearance of the teeth have been performed since the dawn of human civilization and this is well documented in our recorded history. These practices have varied in accordance to the stage of scientific knowledge available at the time and as a response to cultural values and social behavior.
The term ‘smile design’ began to appear in the dental literature more recently. A review of all scientific work indexed by MEDLINE at the Library of Congress reveals the term was first used by Morley 8 in 1990. Feigenbaum 9,10 followed with scientific papers delineating the process required to design one’s smile. Other scientific papers using the term ‘smile design’ were subsequently published by Nixon11, Golub-Evans12, Messing13, Dorfman14, Chalifoux15, Morley16,18,20, Gilmore17, Ward19,25, Berland21, Snow22, Donitza23 and LeSage24 among others.
One of the latest iterations of the smile design science, the DSD or Digital Smile Design26 protocol, has achieved considerable success in spreading the concept and reaching an international audience.
HISTORY AND CONTEXT
Before the fast notebook computers and flexible smile design software available today solutions for treatment planning and smile design included:
(1) William Dorfman’s ‘The Smile Guide’ 27,
(2) Valley Dental Arts’ ‘MDM – Master Diagnostic Model’ 28,29,30,31,
(3) Zhermack’s Kalco Facial Reproduction System 32,33,
(4) Smile Art smile simulation service 34,
(5) Lorin Library Smile Style Guide 35,
(6) The Ladder dental characterization guide 36, and many others.
Early attempts at smile design included imaging services, special wax diagnostic models, imaging applications, smile catalogs, and other tools that made it easier for dentist and patient to communicate and choose their desired result. Other solutions appeared later and they included:
(1) DenMat’s Smile Simulation 37,
(2) SNAP Cosmetic Simulation Software 38,
(3) Panadent’s Clear Tooth Guides 39,
(4) Panadent’s Smile Now Starter Kit 40,
(5) PreVu Cosmetic Simulation and Smile Design Software 41,
(6) Smile-Vision Cosmetic Imaging 42,
(7) SmileSIM 43 and a variety of others.
Recently numerous protocols have emerged that rely on a new generation of faster computing platforms. They include:
(1) Digital Smile Design (DSD) 26,
(2) Digital Smile System DSS3 44,
(3) Planejamento Digital do Sorriso (PDS) 45,46,
(4) Phibo’s Smile 5D iPad Smile Design app 47,
(5) Planmeca’s Romexis Smile Design 48,
(6) Smylist Aesthetic Design Software 49,
(7) Smile Designer Pro 50,
(8) CEREC Smile Design 4.5 51,
(9) VisagiSMile 52,
(10) Photoshop Smile Design Technique 53,54,55 and many others.
Some of these run on conventional scale computing platforms (PC or Mac computers) while others have been designed to run on Apple’s iOS (iPad platform). As can be expected each of these systems has its own advantages and disadvantages. One general disadvantage usually associated with dedicated systems developed for vertical markets is their high cost. Some of the protocols available today fall under this category while others rely on the use of generic software (Apple’s Keynote and Microsoft’s Powerpoint software). It is important to note that while Apple’s Keynote can be downloaded by Macintosh users free of charge, Microsoft’s Powerpoint must be purchased and is available as part of a subscription to the Microsoft Office software bundle.
A vertical market is a market in which vendors offer goods and services specific to an industry, trade, profession, or other group of customers with specialized needs. It is distinguished from a horizontal market, in which vendors offer non-specific, broad-range of goods and services to a large group of customers with a wide range of needs. Vertical market software is software created to address the needs of any given business within a discernible vertical market.
Applying the definition above to our context Adobe InDesign is a horizontal market software because it has been created for the design of numerous different types of publications, web content and artwork. It appeals to a very large audience. Any software available for smile design is a vertical market application since it appeals only to a small audience of dental professionals interested in using it for one single task.
DESKTOP PUBLISHING
As the trend towards computer-assisted or computer-aided treatment plans continues it is important to assess how well and how easily it is possible to perform this task. Many protocols in use today utilize generic tools not created for design and/or illustrations but for presentations. Examples include Apple’s Keynote and Microsoft’s Powerpoint applications that have been created for the design and presentation of ‘slides’ and audio-visual content. These are simple and easy to use but lack many of the tools one should expect to find in a design-oriented or design-centric application.
The author has used for many years a different systematic approach to this task with the aid of desktop publishing and design applications that provide superior tools and make the process simpler and more reliable. The concept of desktop publishing emerged in the late 1980s when the method used for the creation of print publications was progressively replaced by a computer based system that made it faster, simpler and easier to use. Magazine and publications were no longer created as composites, photographed, transformed into ‘masters’ by imagesetters and used in large scale printing presses for printing pages. These magazines and publications were now produced entirely by computers with large monitors (in many instances large enough to display a full page or a two-page spread in real size), desktop publishing software and printed directly to film using an imagesetter. The film was them used on printing presses to produce printed content.
THE EVOLUTION OF ADOBE INDESIGN
Released in 1984 Aldus Pagemaker was the first application to truly challenge the Status Quo of publishing. It became and instant success and coupled with other advancements that included the Macintosh computer, the laser printer and Adobe’s PostScript language, it became the new way to produce books, magazines and other printed content. Despite competition from its rival product QuarkXPress released by Quark Inc. in 1987, Aldus would rule the desktop publishing market from the time of its introduction in 1984 until its merger with Adobe in 1994. In the following year (1995) Adobe would also acquire Frame Technology Corp. and its primary product FrameMaker, a desktop publishing application used for highly technical content. FrameMaker was originally introduced for the Sun Microsystem OS or SunOS (a variation of UNIX) but it became so popular that it was ported to the Macintosh, which became its second platform. At the height of its popularity FrameMaker was available on more than 13 different UNIX workstations that included NeXT Computer’s NeXTSTEP and IBM’s AIX. FrameMaker was so advanced on the platforms that instead of pixel graphics it used Display PostScript, a vector language created by Adobe’s founder John Warnock to render all monitor content with precision. FrameMaker and Pagemaker became competing offerings and with this move Adobe attempted to control the desktop publishing market.
By 1988 PageMaker had lost a big percentage of the publishing of the publishing market to QuarkXPress. The feature rich version 3.3 of QuarkXPress released in 1992 followed by version 4.0 released in 1996 were far superior to PageMaker and attracted a large percentage of the desktop publishing user base. At this point Quark had expressed its desire to acquire Adobe and discontinue PageMaker. In response to mounting pressure Adobe began to work on a secret new desktop application to replace PageMaker. The project had been started by Aldus before the acquisition by Adobe and was code-named ‘Shuksan’. It was later code-named ‘K2’ and was finally released as InDesign version 1.0 in 1999. In 2002 Adobe InDesign was the first desktop application released for the Mac OS X operating system. Version 3 of InDesign (also named InDesign CS) received a boost in distribution as it was bundled with Photoshop, Illustrator and Acrobat in a package named Adobe Creative Suite or CS. As of this writing there have been 34 versions of InDesign since version 1.0 and its latest version is 16.1 (CC 2021). InDesign has received various improvements in subsequent releases and incorporated features not available on other desktop publishing applications. Its features include support for unicode, ability to export documents in a variety of file formats, support for advanced typography with opentype fonts, advanced transparency, layout styles, optical margin alignment, and many others.
After the development and introduction of InDesign Adobe found itself with three different product lines competing for the same audience: PageMaker, FrameMaker and InDesign. PageMaker and FrameMaker were eventually discontinued and Adobe focused its development efforts on InDesign, which has arguably become the most powerful tool ever created for desktop publishing. InDesign is currently available in 24 languages for the Mac OS and Windows computing platforms. It has grown to be a worldwide desktop publishing phenomenon and sparked the emergence of 86 user groups in 36 countries with a total membership surpassing 51,000 members.
PLATFORM SELECTION
In order to discuss our Computer-Assisted Smile Design or CAD-CAM Smile Design process it is also important that we first explain our choice of computing platform. Personal computers have come a long way and they continue to evolve but not all platforms are created equal. There are multiple reasons we recommend the Macintosh computer as the preferred choice for Computer-Assisted Smile Designs and any other type of work. Apple was the company responsible for bringing the personal computer to the masses and for making computers accessible to the average individual. A quote attributed by many to Thomas Watson, president of IBM, reveals the thinking at the time. According to him, ‘there might be a world market for approximately 5 computers’ (circa 1943). Large corporations believed computers were to remain large and expensive items only accessible to a few wealthy corporations that could afford the high price they commanded. Apple’s vision was different. In Apple’s early days Steve Jobs, one of its founders, made headlines for his vision that computers should be made accessible to the masses. According to him computers were like ‘bicycles for the mind’ 56 and everyone would be made more creative and productive for having one. Apple made the Apple II a success and the Macintosh an even bigger success.
The Macintosh has evolved and become a powerful computing platform. One of the main advantages offered by Apple from the beginning was the integration between hardware and software that comes only when the same company that designs and manufacturers one also does the other. The level of integration observed on the Macintosh has always been evident by its dependability and stability. However, the Macintosh operating system also crashed and froze every now and then. The greatest transition for the Macintosh came with Steve Jobs’ return to Apple in 1997 and the acquisition of his NeXTSTEP OS. The NeXTSTEP OS represented the transition from the classic Mac operating system to the newer OS X we have all come to know.
The NeXTSTEP OS was an operating system developed by Steve Jobs for his NeXT computers. NeXT computers were well designed machines believed by many to be way ahead of their time. Among many of the advanced features only offered by NeXT computers were PostScript on screen graphics (the same vector based drawing language used for printing), 400 dpi laser printer created in partnership with Canon (at a time when the best and most expensive printers had 300 dpi resolution), laser WORM drive (re-writable laser disc or WORM – Write Once Read Many), FAX built-in to send and receive documents directly from the screen, e-mail client, library of books and encyclopedias that included Shakespeare’s complete literary works, and many more. The NeXTSTEP was the result of Steve Job’s desire to build the next generation of operating systems and he made a perfect choice when he decided that the NeXTSTEP OS should be based on UNIX.
UNIX was originally developed in the 1970s by Bell Labs and intended to be used inside the Bell System but AT&T later decided to license it to outside parties for both academic and commercial uses. This led to the introduction of numerous variations of UNIX that included University of California, Berkeley (BSD), IBM (AIX) and Sun Microsystems (Solaris). In the early 1990s AT&T sold its rights to UNIX to Novell, which in turn sold it to Santa Crux Operation (SCO) in 1995. The UNIX trademark was passed to the Industry Standards Consortium ‘The Open Group’, which allows the use of the trademark for certified operating system in full compliance with the ‘Single UNIX Specification’. Among these Apple’s OS X represents the largest UNIX installed base to date 57,58,59,60.
The UNIX operating system is considered by computer scientists and engineers as the most robust, powerful and secure operating system in existence today. It was created and evolved to be a large scale operating system, to allow networking and multiple users, and to provide security features not found on any other operating system. It is not by coincidence that UNIX is the operating system used as the backbone or framework of the Internet. It is also used by the US Defense Department, US Government, US Military, universities, research centers, and many other institutions and applications where security and dependability are crucial requisites.
The Macintosh interface we see today is running over the most robust operating system in existence and one designed to provide users the security they expect for their private and confidential information. UNIX makes virus attacks less likely due, in part, to many intrinsic security features built into the OS. The lower number of Macintosh computers compared to those running the Windows operating system makes the latter a much more interesting target for hackers. British CESG (Communications-Electronics Security Group), the group within the UK Government Communications Headquarters (GCHQ), released a list 61 with some of the operating systems available today and their level of security risk. According to them the Windows operating system is the most vulnerable while UNIX and its variations (among these Apple’s OS X) provide the greatest possible security for its users.
According to Macworld Magazine 62 the following are the ten reasons why Macs are better than Windows’ PCs:
1. The best user experience
2. Seamless integration with iOS through Hand-Off and Sidecar
3. There are too many PCs to choose from
4. Security
5. Macs come with excellent software included
6. Build quality and craftsmanship
7. Apple optimizes the components
8. Macs have the best screens
9. Apple offers best customer support
10. User satisfaction
HARDWARE
Although there has been a trend towards the use of notebooks in place of desktop computers, the author remains an advocate of the desktop form factor. Certain features present on desktop computers can’t possibly be made available on notebooks. In addition, desktops tend to be more powerful, more flexible, can be connected with larger storage units and to large monitors. This is not to say that smile designs can’t be performed on notebook computers. Quite the contrary. Notebook computers have evolved to offer advanced performance and many present processing power that meets or surpasses the need of most users. Users are advised to review different models of notebook and desktop computers in order to choose the right one for their needs.
As I am often questioned about specific components of my personal workstation I am listing these components here merely for informational purposes. Readers should not see this as a list of required or recommended items for smile design. Each of these components may be implemented according to the discretion of individual users and only if they find these components to meet their professional needs. Figure 1 and Figure 2 show the workstation and all of its components.
The author’s workstation is composed of a Macintosh Pro desktop computer, an external 32 TB G-Studio XL RAID drive (with 8 internal hard disks) and a large Dell 43 inch 4K monitor. The large external storage drive connected via Apple’s Thunderbolt interface can reach data transfer rates of up to 1350 MB/s (megabits per second). The drive set to RAID 0 or stripping mode allows data to be written to and read from all 8 internal hard disks simultaneously for maximum speed. This speed is helpful when transferring files but makes a substantial difference when editing and working with patients’ photos and videos.
The following is a list of all computer workstation components:
01. Macintosh Pro Desktop Computer Quad-Core Dual GPU, 16 GB RAM, 1 TB Flash HD
02. Macbook Pro 17 Inch Notebook Computer
03. MacBook Pro 13 Inch Notebook Computer
04. Dell P4317Q 43 Inch 4K Computer Monitor
05. Apple USB SuperDrive
06. LaCie BDXL d2 Blu-Ray Optical Reader/Writer Drive
07. Pioneer BDR-XS07S BDXL and M-Disc Blu-Ray Reader/Writer Drive
08. G-Technology G-Speed Shuttle XL 32 TB RAID External Drive
09. OWC ThunderBay 4 Mini 8 TB SSD RAID External Drive
10. OWC ThunderBay 4 12 TB RAID External Drive (2 units)
11. LaCie 2big Dock Thunderbolt 3 16 TB RAID External Drive
12. OWC Drive Dock for 2 Hard Disks (Thunderbolt 2, USB 3)
13. Monogram Creative Console Programmable Controls
14. Loupedeck+ Adobe Lightroom Editing Keyboard
15. Apple iPad Pro 12.9 Inch
16. Apple Magic Keyboard with Numeric Keypad
17. Apple Magic Trackpad 2
18. Apple Pencil 2nd Generation
19. ShuttleXPress Shuttle and Jog Wheel
20. APC XS 1500 VA Back-UPS (Uninterruptible Power Supply)
21. Tripp-Lite TLP76MSG 7 Outlet Surge Protector Power Strip w/ 7 Individual Switches (2)
22. Canon ImagePROGRAF PRO-1000 C-size inkjet photo printer
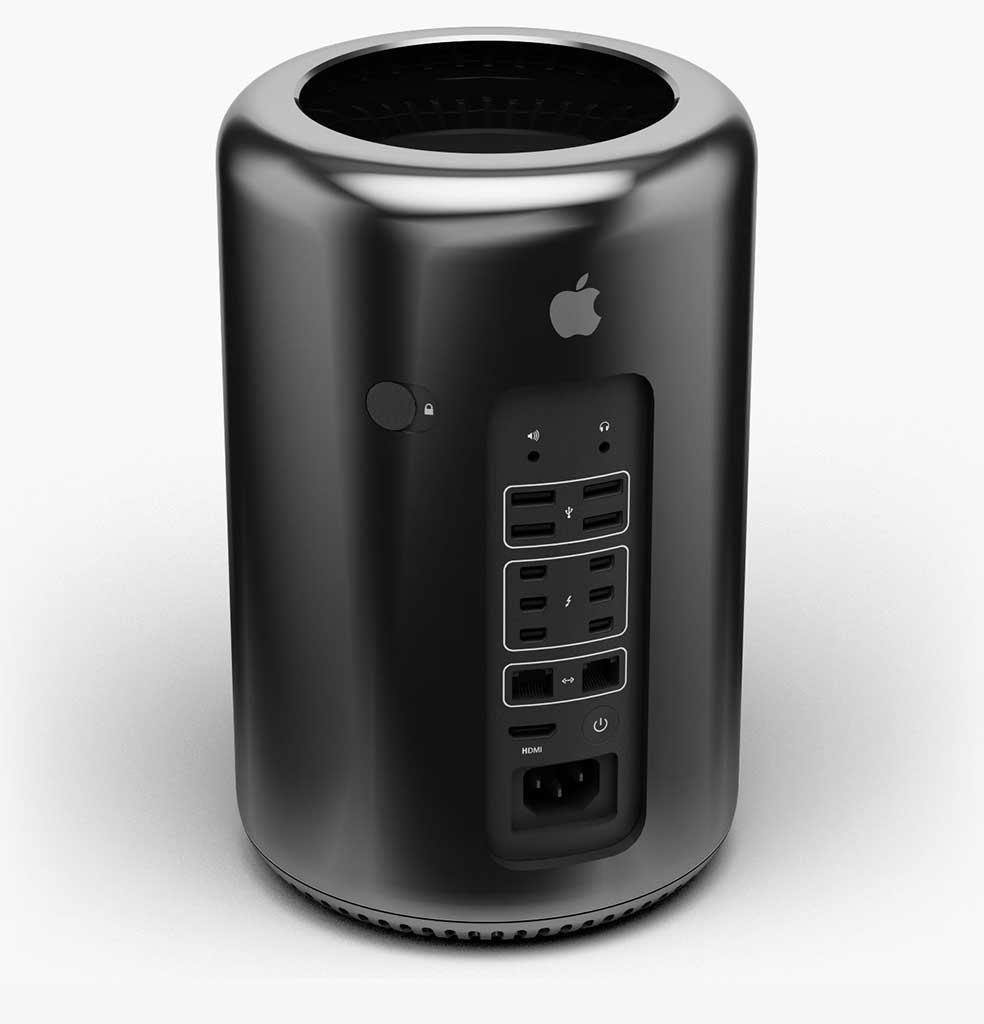
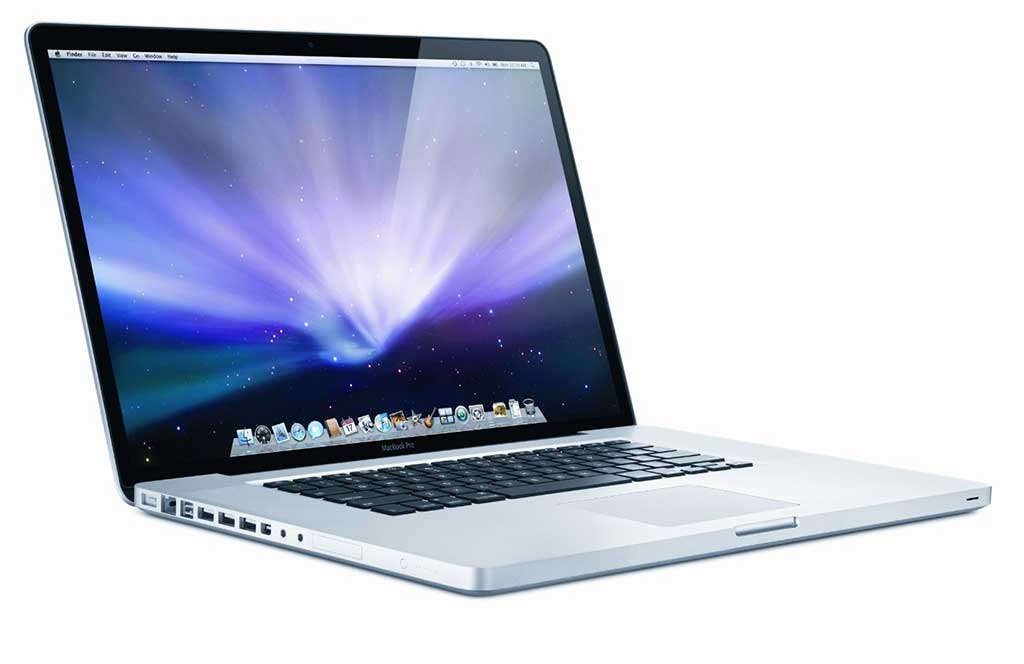
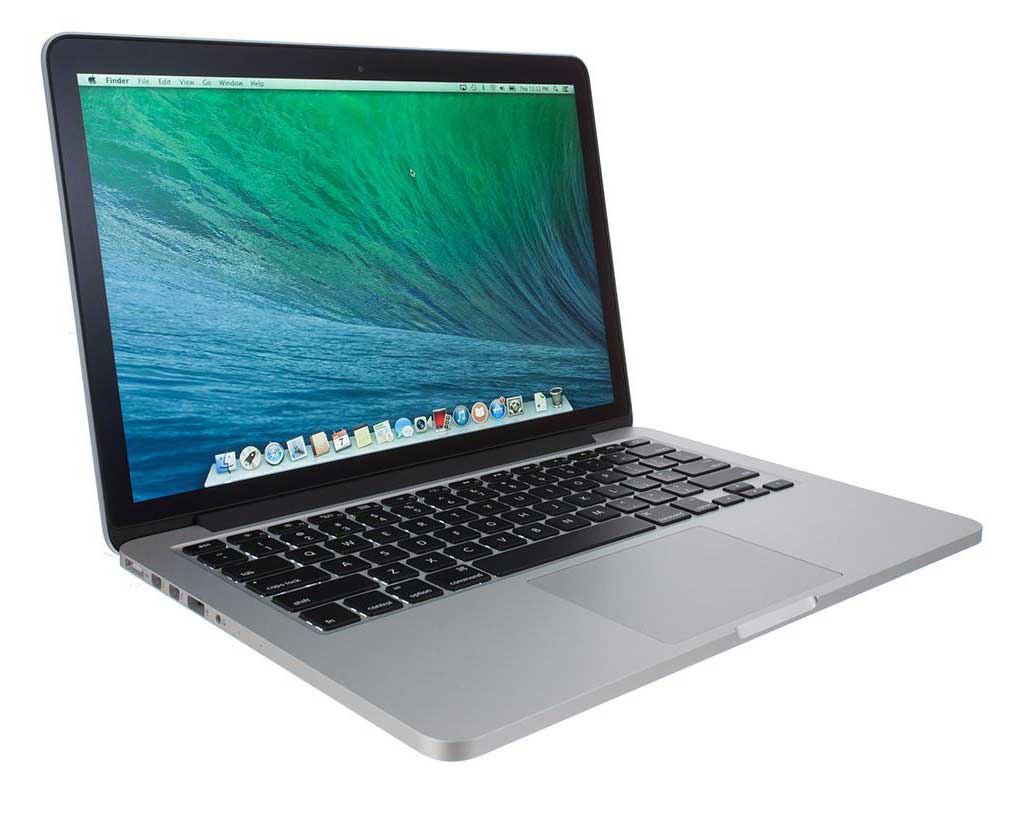
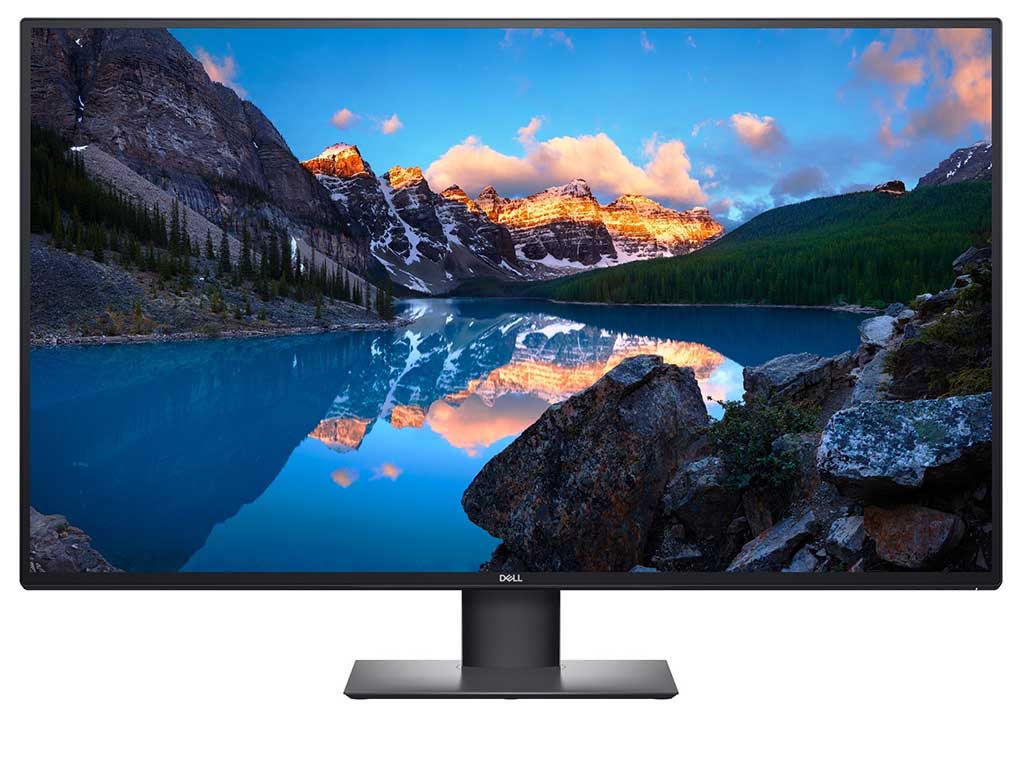
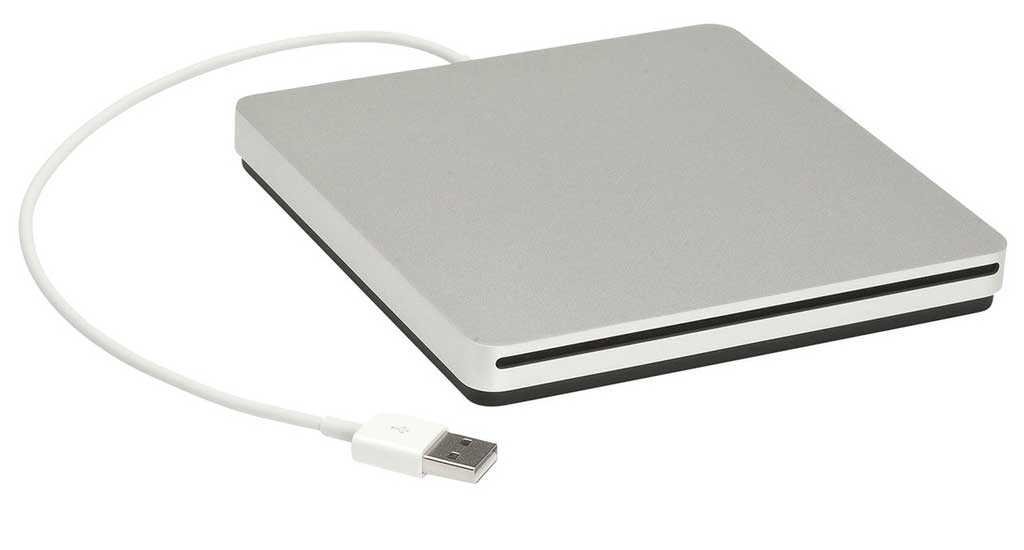
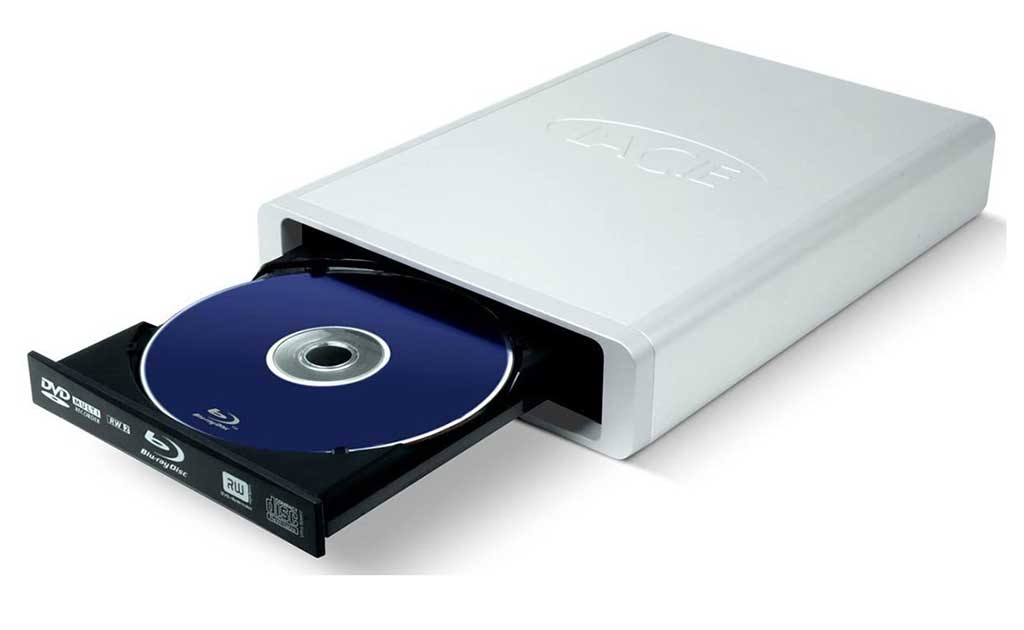
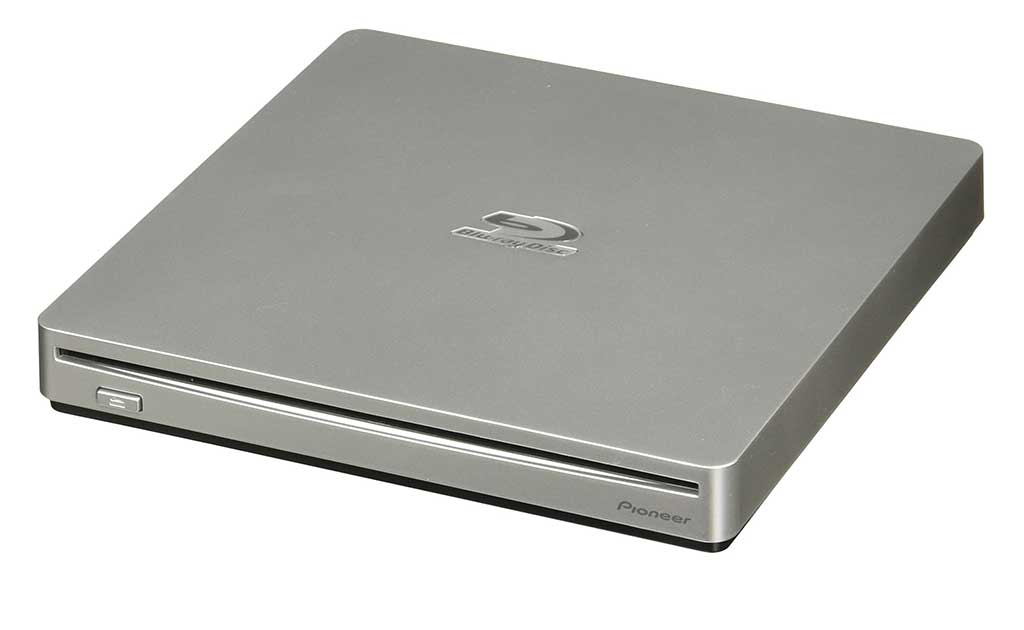
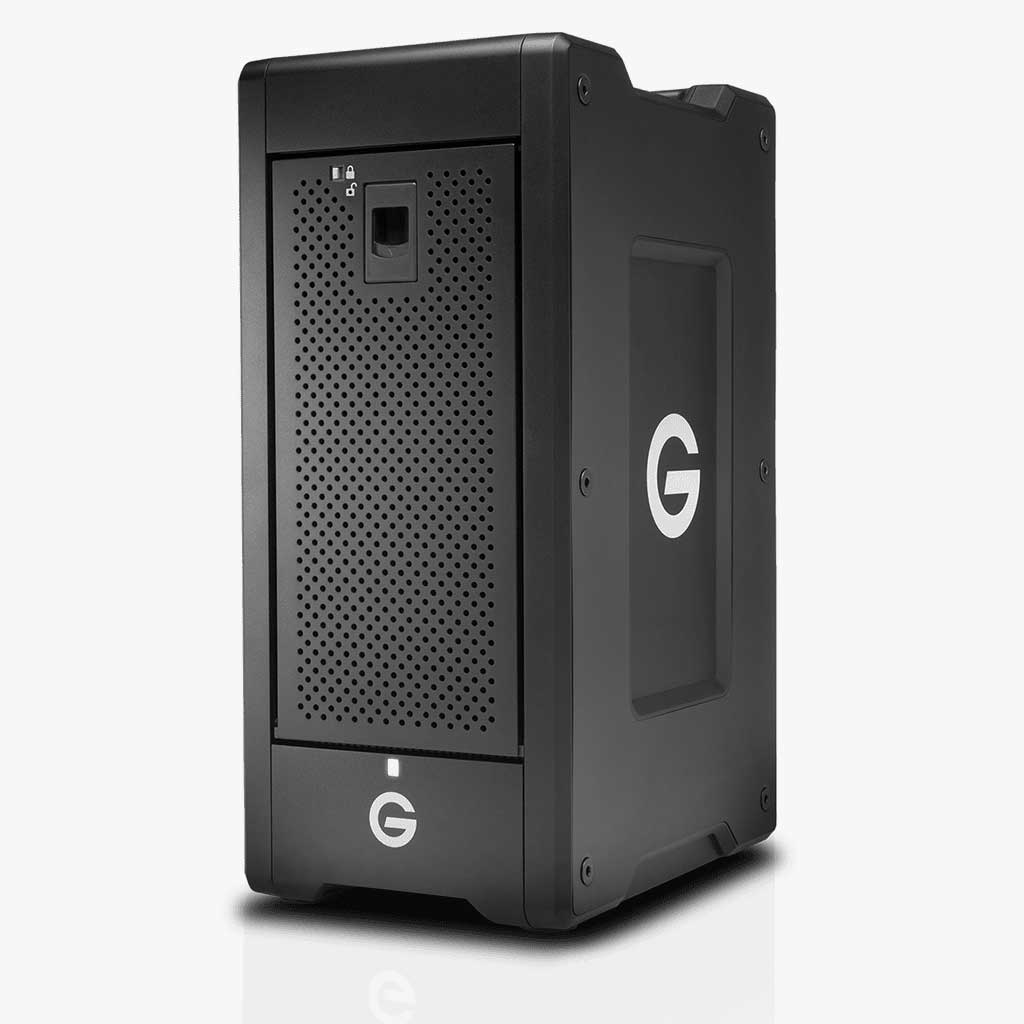
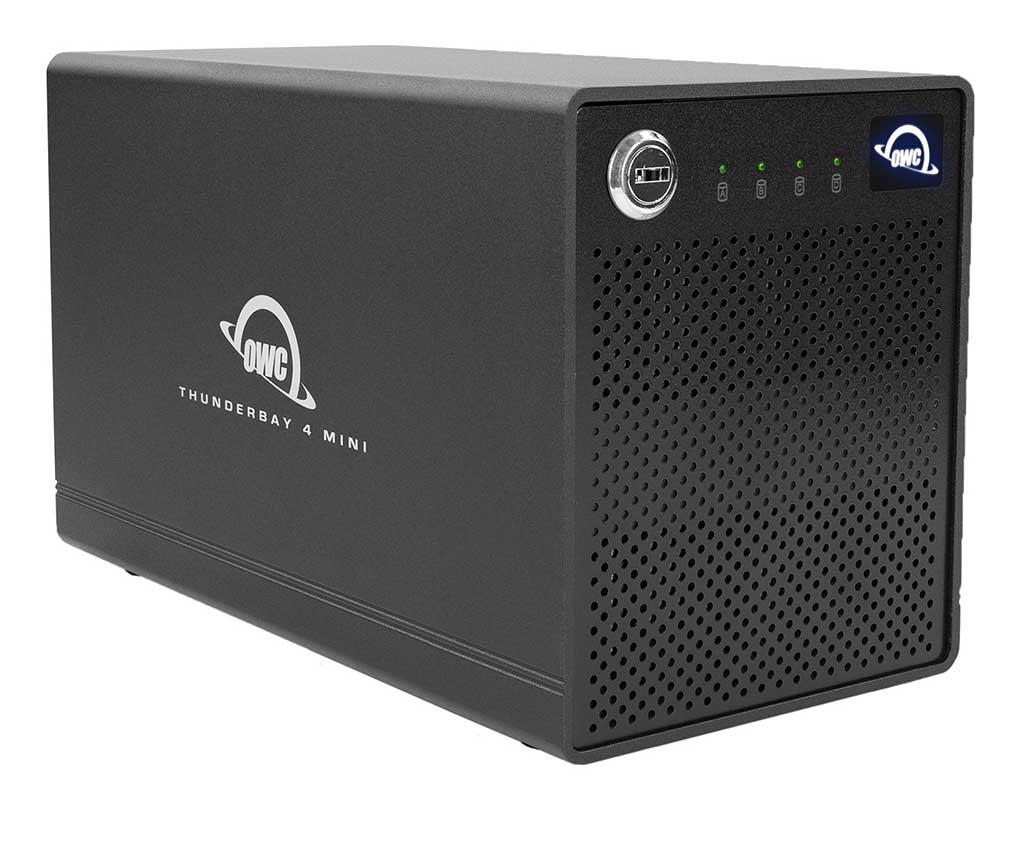
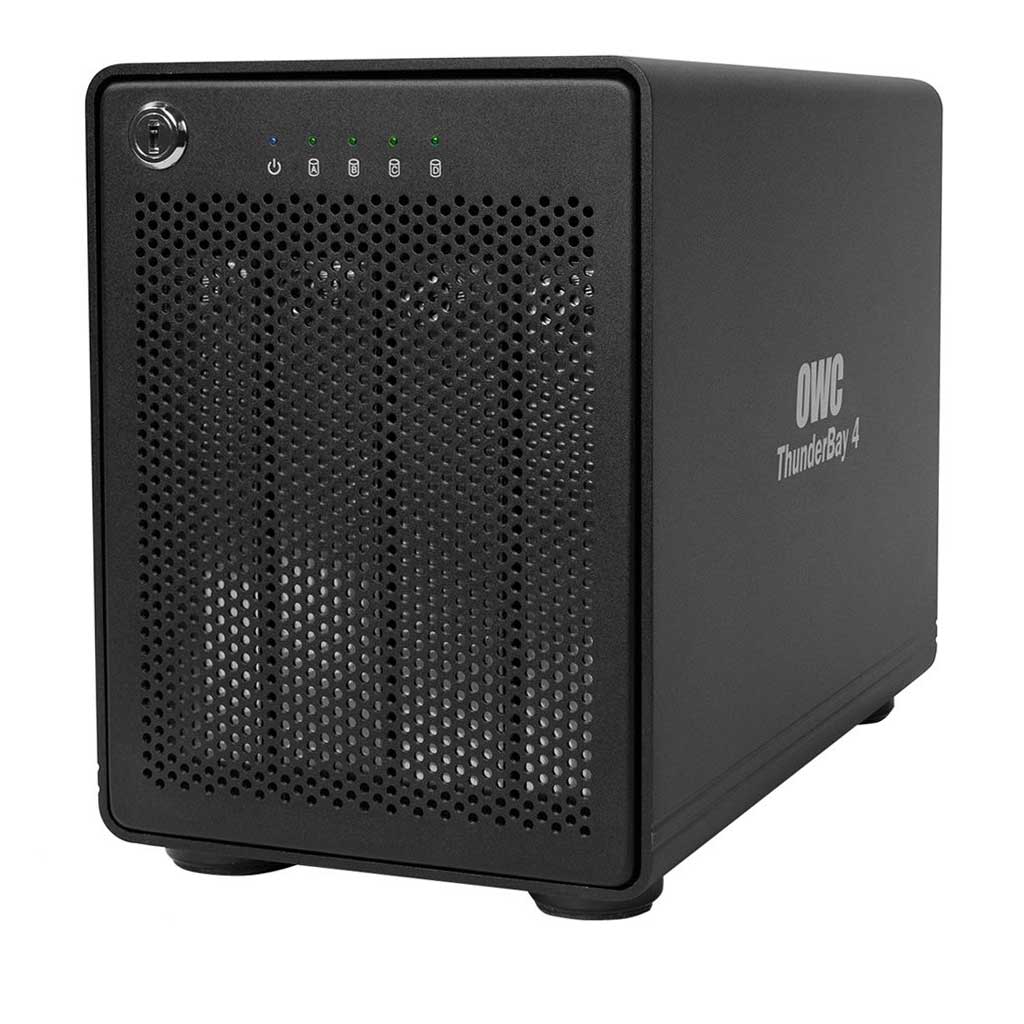
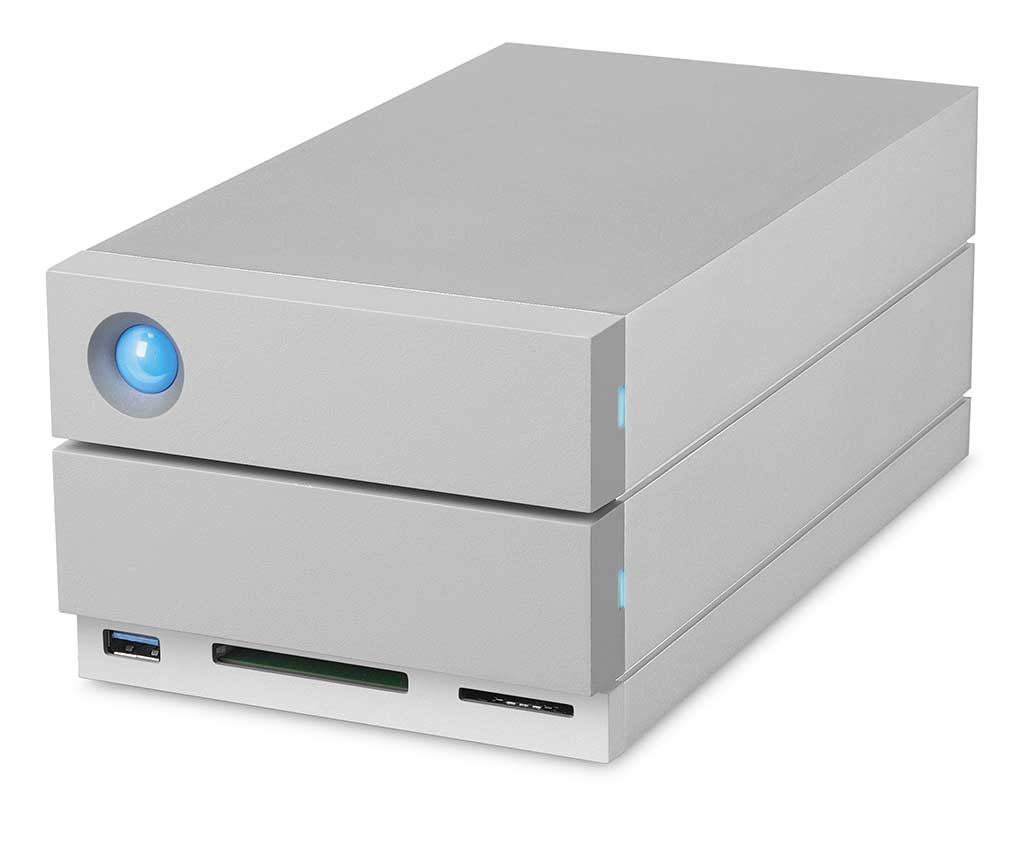
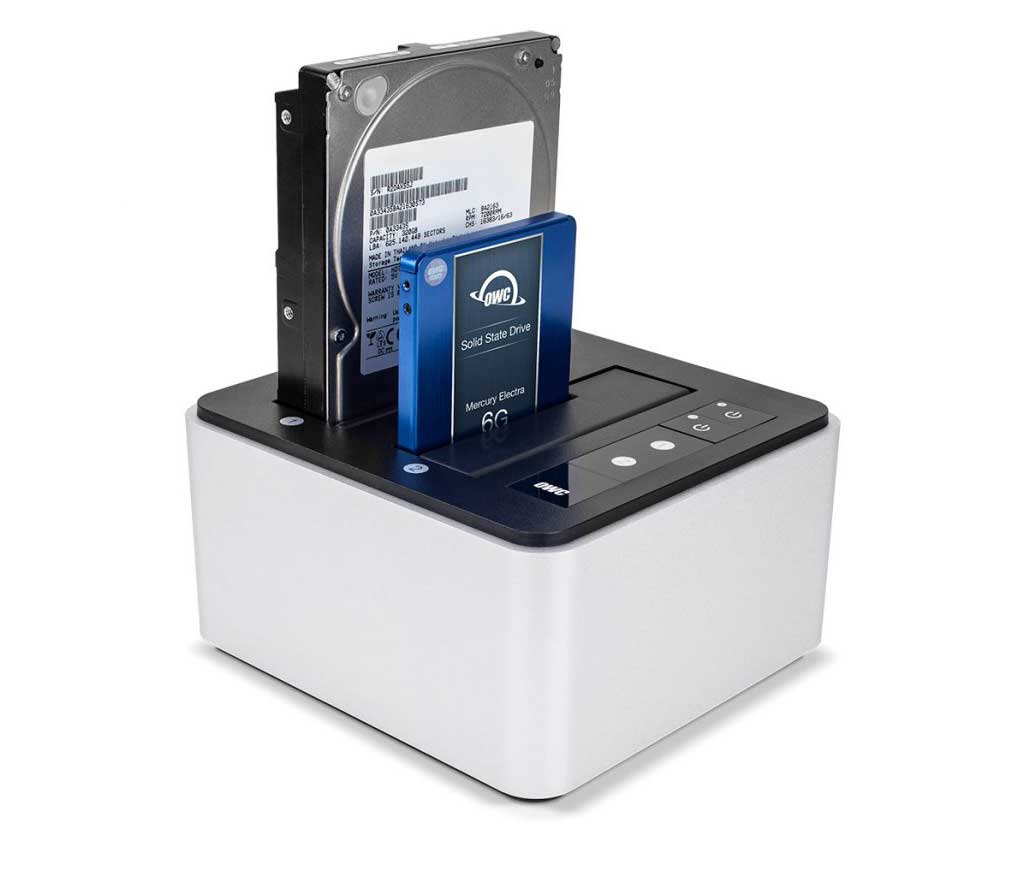
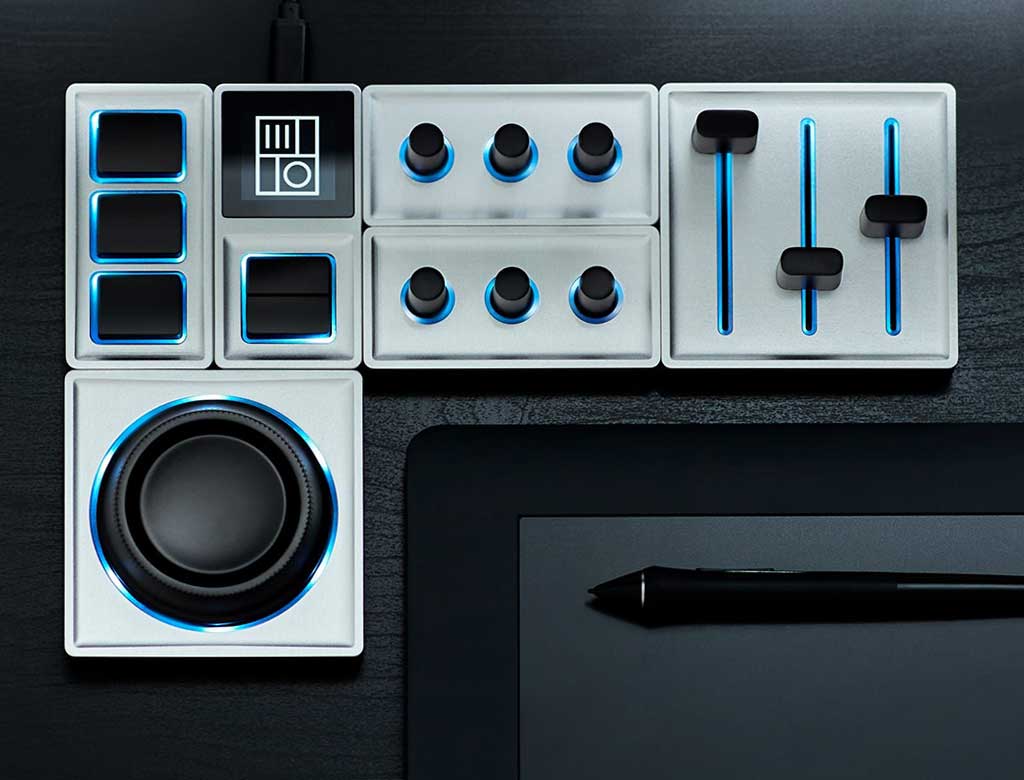
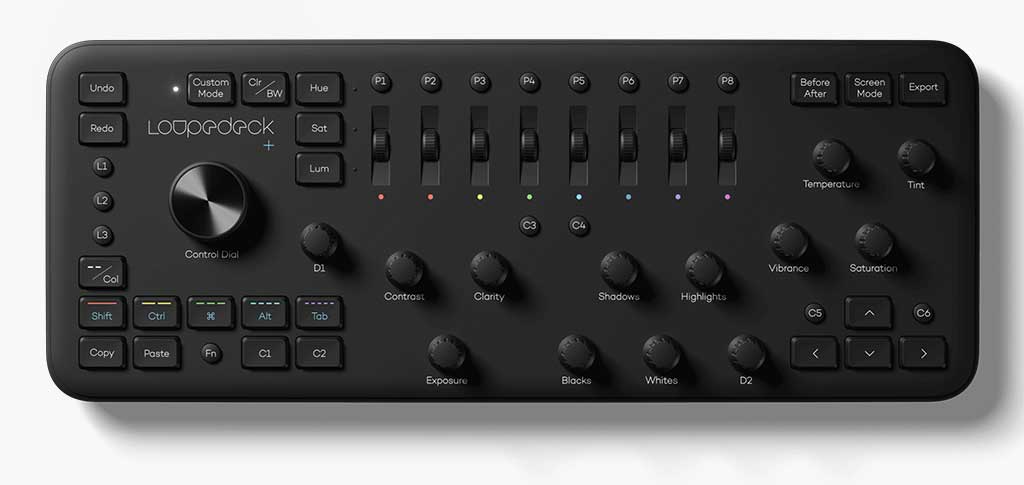
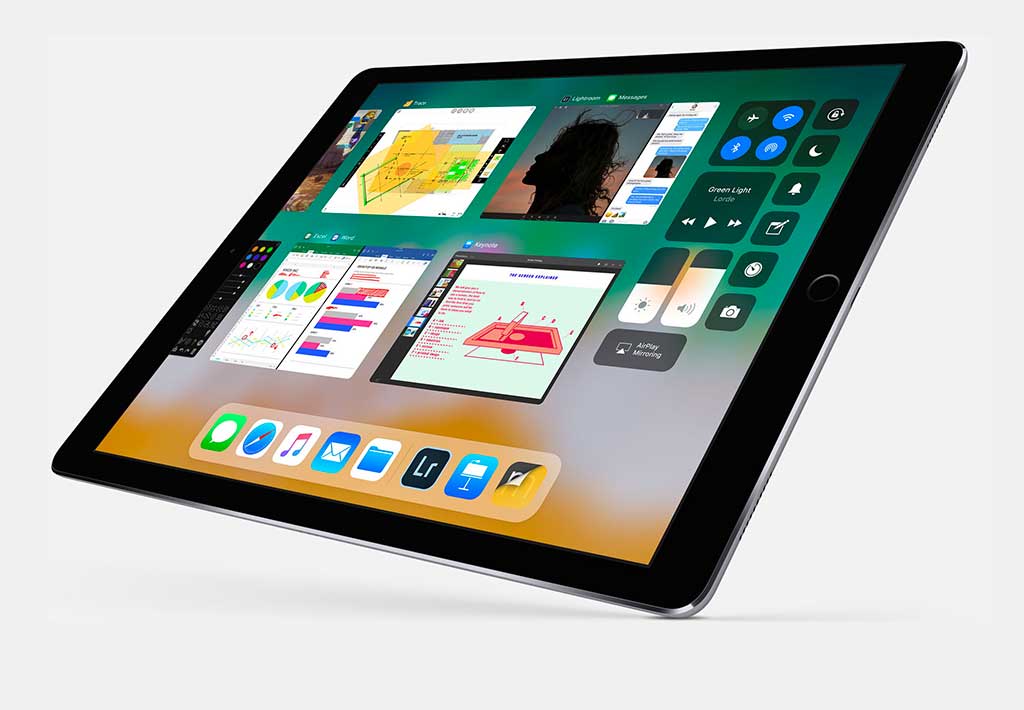
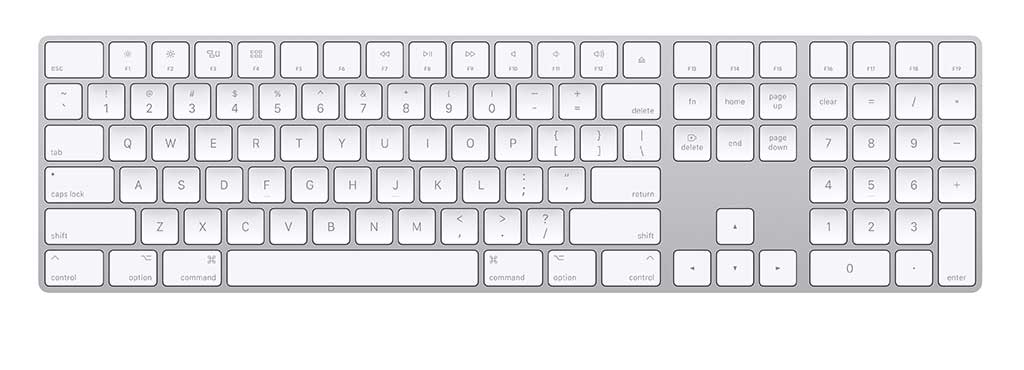
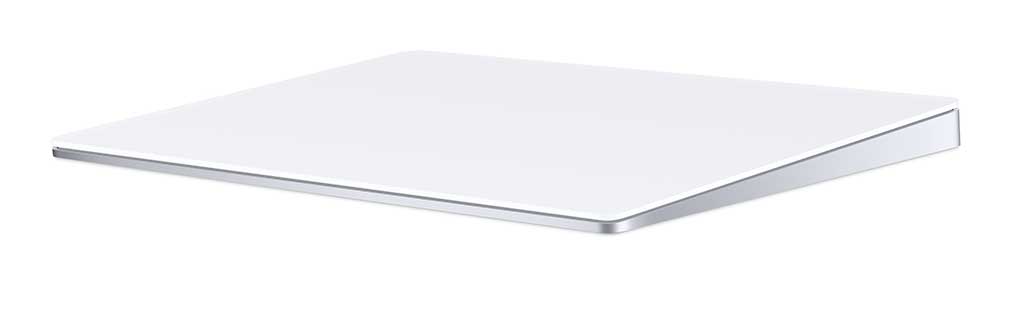

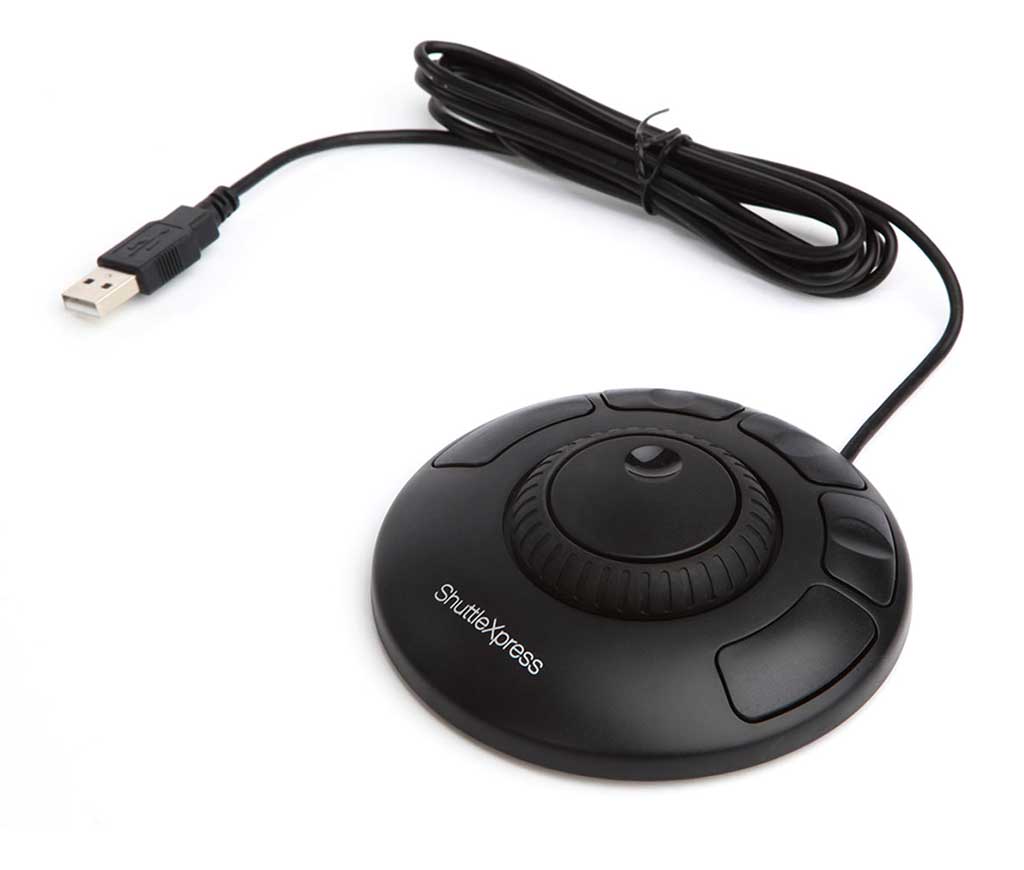
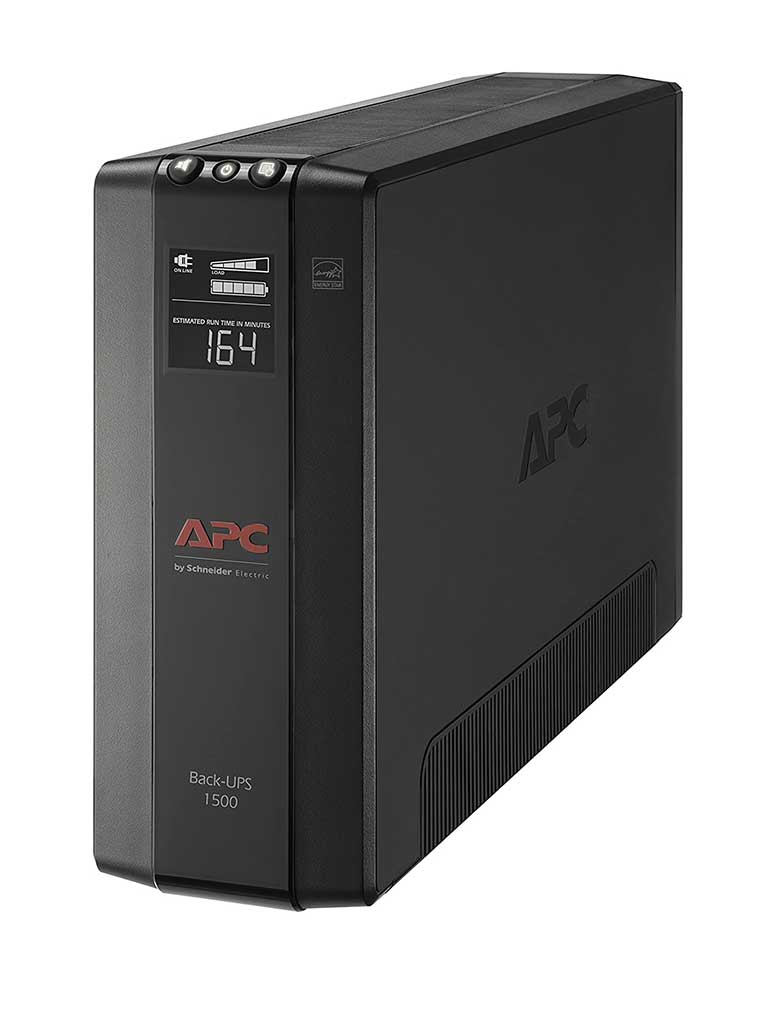
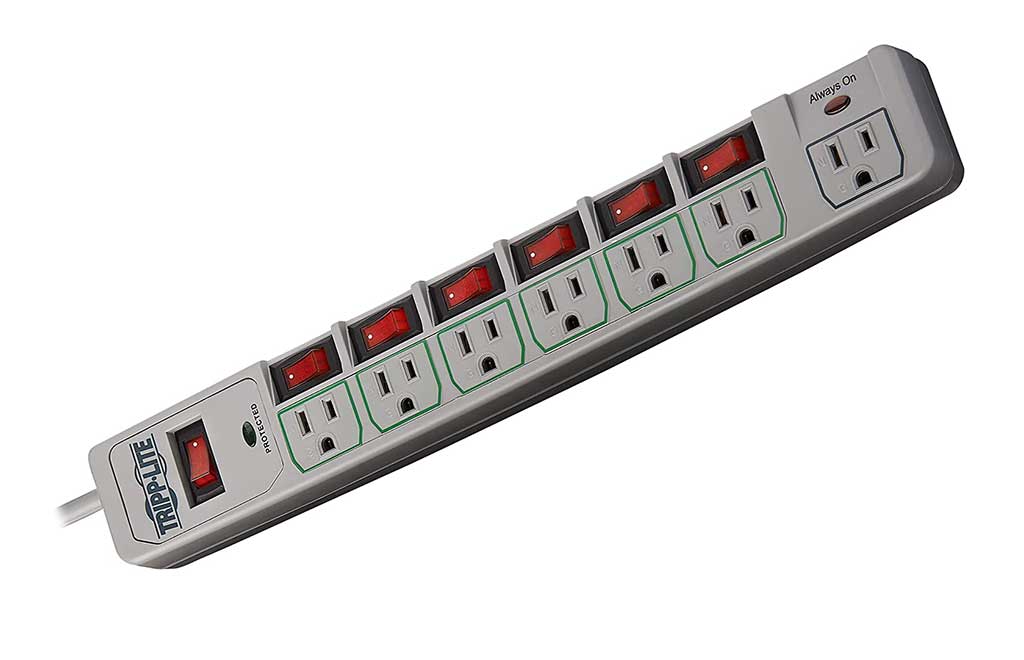
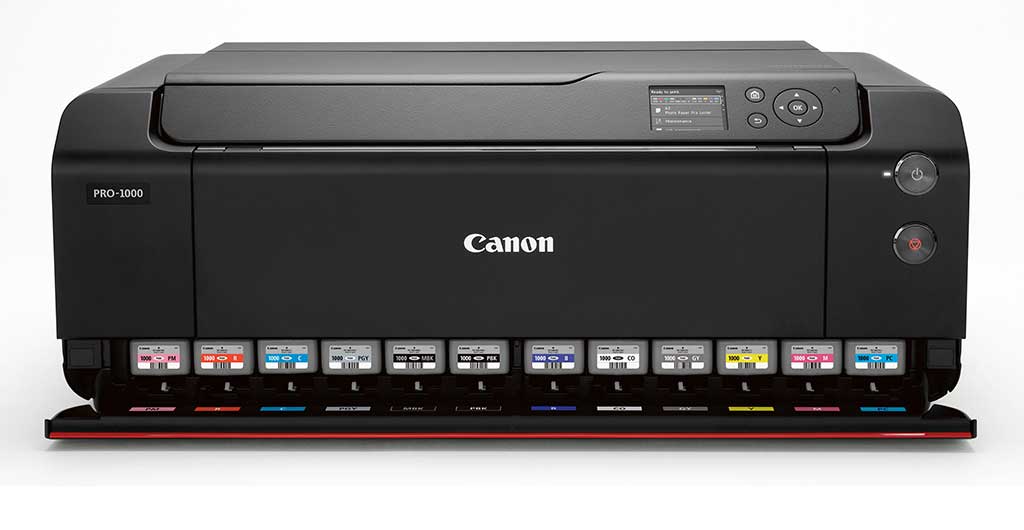
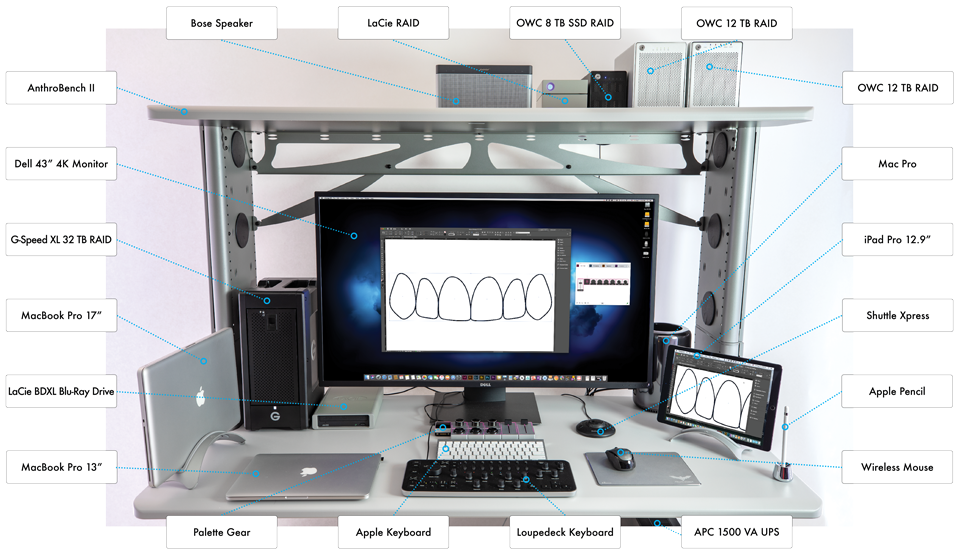
Figure 1: Author’s Computer Workstation and Its Components (Frontal View).
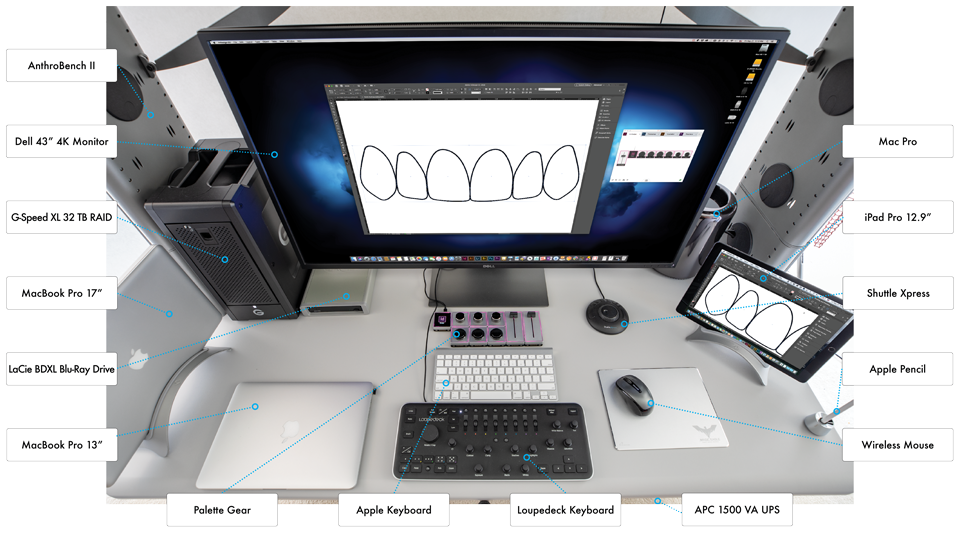
Figure 2: Author’s Computer Workstation and Its Components (Top View).
1. Computer Performance
Computers and particularly personal computers have experienced a dramatic improvement in performance since their introduction in the late 1970s and early 1980s. The Apple II, IBM PC and the Macintosh are examples of early personal computers that were impressive in their time but would pale in comparison if evaluated in terms of processing power against today’s least powerful computers or even an average smartphone.
The fast pace of processor development has triggered an exponential increase in computer performance. A personal computer purchase today exhibits performance significantly superior to that of a computer purchased just 12 months ago. This increase in performance allows us to use a simple and relatively inexpensive notebook computer to perform tasks that could only be performed with an expensive UNIX workstation only 10 years ago. This is relevant to readers because a simple Macintosh notebook computer available today provides more than adequate performance for Computer-Assisted Smile Designs.
The computer industry uses several criteria and tests to evaluate a computer’s performance 63,64,65. Among them are (1) Processing Speed, (2) Response Time, (3) Throughput, (4) Computing Resources, (5) Availability, (6) Data Compression, (7) Bandwidth, (8) Data Transmission and others. Processor speed is considered by many as the most popular measurement having become synonymous with computer performance and the one measurement we all utilize when comparing different computing platforms. Processing speed is usually measured as (1) Instructions per Second or (2) FLOPS (Floating Point Operations Per Second). FLOPS is preferred over Instructions per Second as it provides a more accurate measurement of computer and/or processor performance. As computers continued to improve FLOPS became kFLOPS (KiloFLOPS or thousand FLOPS), MFLOPS (megaFLOPS or million FLOPS), GFLOPS (gigaFLOPS or billion FLOPS), TFLOPS (teraFLOPS or trillion FLOPS), PFLOPS (petaFLOPS or quadrillion FLOPS), EFLOPS (exaFLOPS or quintillion FLOPS), ZFLOPS (zettaFLOPS or sextillion FLOPS) and YFLOPS (yottaFLOPS or septillion FLOPS).
| Computer | Year | Processor |
|---|---|---|
| Apple II | 1977 | MOS Technology 6502 @ 1.023 MHz |
| IBM PC | 1981 | Intel 8088 @ 4.77 MHz |
| Sun Microsystems Sun-1 | 1982 | Motorola 68000 @ 8 MHz |
| Silicon Graphics IRIS 1000 Workstation | 1982 | Motorola 68000 @ 8 MHz |
| Macintosh | 1984 | Motorola 68000 @ 8 MHz |
| Macintosh II | 1987 | Motorola 68020 @ 16 MHz |
| Macintosh G3 | 1997 | PowerPC 750 @ 66 MHz |
| Macintosh G4 | 1999 | PowerPC 7400 @ 400 MHz |
| Macintosh Powerbook Titanium 15" | 2001 | PowerPC 7410 @ 400 MHz |
| Macintosh G5 | 2003 | PowerPC 970 @ 2.0 GHz |
| Macintosh Mini | 2005 | PowerPC 7447 @ 1.42 GHz |
| Macintosh Powerbook 15" | 2006 | Intel Core i7 @ 2.6 GHz |
| Macintosh Pro | 2013 | Intel Xeon E5-2697 @ 3.5 GHz |
| Macintosh iMac Pro | 2017 | Intel Xeon W-2190B @ 4.3 GHz |
| Macintosh Mini | 2018 | Intel Core i7 6-Core @ 4.6 GHz |
| Macintosh Macbook Pro 15" | 2018 | Intel Core i9 6-Core @ 4.8 GHz |
Table 1: Processors Installed in Different Generations of Personal Computers and Workstations
Microprocessor manufacturer Intel recently introduced the CORE i9 x-Series chip 66, its most powerful processor to date. The chip is equipped with up to 18 cores and reaches one teraFLOPS, which means it can perform a trillion computational operations per second. This single processor is as powerful or more than a turn-of-the-century supercomputer. The Intel CORE i9 is presently available as an option on the MacBook Pro 16 Inch and this model serves as a good platform for Computer-Assisted Smile Designs. Other options that meet or surpass the require performance include the Mac Mini (Intel Core i5 or i7 with 6 Cores, Apple M1 with 16 cores), iMac (Intel Core i3, i5, i7 or i9 with 2, 4, 6 or 8 Cores), iMac Pro (Intel Xeon W with 10, 14 or 18 Cores) and Mac Pro (Intel Xeon W with 8, 12, 16, 24 or 28 Cores).
2. Storage
As software has grown increasingly more complex ad the files they produce have experienced large increases in size it has become necessary for storage devices to follow this growth in order to accommodate these changes. Storage capacity initially measured in Kilobytes (KB) transitioned to Megabyte (MB) devices, then to Gigabyte (GB) devices and finally to today’s storage devices with Terabytes (TB) of storage space. Large storage with high transfer speeds is crucial when one is working with large image or video files. Video requires high streaming speeds in order to appear fluid, without breaks or interruptions. Image files generated by high resolution devices can produce file sizes equal or superior to 100 MB. Such is the case with slides scanned with a dedicated film scanner. The author has converted many of his old slides into digital images using a Nikon Super CoolScan 4000 ED film scanner and the files produced have an average size of 120 MB each. For images and video to be transferred and/or stored without delay two things are necessary: (1) storage devices that can read and write data at high enough speeds, and (2) input/output ports capable of transferring data at high speeds.
| Storage Device | Year | Type | Capacity |
|---|---|---|---|
| Magnetic Tape (UNISERVO) | 1951 | Linear Magnetic Tape | 1.5 MB |
| Hard Disk | 1954 | Fixed Metallic Magnetic Disks | 3.75 MB |
| Cassette | 1975 | Linear Magnetic Tape | 56 KB |
| Floppy 5.25" Disk | 1976 | Removable Flexible Magnetic | 360 KB |
| CD-ROM | 1983 | Optical, Record Once | 194-650 MB |
| Cloud Storage (Compuserve) | 1983 | Remote Storage | N/A |
| Floppy 3.5" Disk | 1986 | Removable Magnetic | 1.44 MB |
| DAT Digital Data Cassette Tape | 1987 | Magnetic Tape | 1.3-80 GB |
| CD-R | 1988 | Optical, Record Once | 650 MB |
| WORM (Write Once Read Many) | 1988 | Optical, Record Once Read Many | 256 MB |
| RAID (Redundant Array of Independent Disks) | 1988 | Fixed, Magnetic Hard Disks | Variable |
| Solid State Drive (SSD) | 1991 | Fixed, Flash Memory | 20 MB |
| Zip Drive | 1994 | Removable Magnetic | 100 MB |
| Jaz Drive | 1996 | Removable Magnetic | 1 GB |
| CD-RW | 1997 | Optical, Record Many | 650 MB |
| IBM PCMCIA II Microdrive | 1999 | Fixed Metallic Magnetic Disks | 170 MB |
| USB Flash Drive (Thumb Drive) | 2000 | Removable, USB Flash Memory | 8 MB |
| Hard Disk Docks | N/A | Fixed Metallic Magnetic Disks | Variable |
Table 2: Different Types of Storage Devices and Their Evolution.
As the cost of storage has decreased, storage capacity has increased and the size of enclosures has remained relatively small, hard disks have become the preferred form of computer storage for most personal computers ad personal workstations. The two most popular hard disk sizes (not to be confused with capacity) are 3.5 inch (used mostly in desktop computers) and 2.5 inch (used mostly in notebook computers). The size here refers to the diameter of the metallic discs or platters inside the hard disk.
While the hard disk is the single, individual storage component, hard drives vary in terms of how many hard disks they have inside. One strategy that has grown progressively more popular over the last decade is the utilization of two or more hard disks inside a larger enclosure in what has been termed a RAID or Random Array of Independent Disks (or Random Array of Inexpensive Disks, as it was labeled in the past).
Compared to cloud storage hard disks are more appealing. One of many existing options today, Amazon’s S3 Cloud Storage67 services is priced at $0.026 per GB of storage space for the first 50 TB. This translates to $416 for 16 TB of storage space paid monthly. LaCie’s 2big 16 TB hard drive (a two disk RAID system) is priced at $850 for a one time purchase price. A total of 16 TB of Amazon S3 Cloud Storage has an annual cost of $4,992 while the LaCie 16 TB external drive costs the same $850. One other concern related to cloud storage systems is the speed of data transfer. Both the Internet service and the cloud service must provide high speeds for data transfer otherwise the back-up or data transfer process can prove unreasonably time-consuming and errors can occur during the transfer. This is particularly disturbing with automated data back-up systems because the data is often transferred at night when the office is closed and errors may go unnoticed since the transfer is done without supervision.
Some storage devices still employ a single internal storage unit – either the traditional hard disk or the new Solid State Drive (or SSD) – but a large percentage of the drives available today particularly those with higher storage capacities rely on the association of two or more internal storage units. These are available with RAID or non-RAID drive architectures. They are defined as follows:
1. RAID, or, Redundant Array of Independent Disks
– RAID types: RAID 0, RAID 1, RAID 2, RAID 3, RAID 4, RAID 5, RAID 6, RAID 10
2. Nested RAID Levels
– RAID 0+1, RAID 0+3, RAID 10, RAID 50, RAID 60, RAID 100
3. Non-RAID Drive Architectures
– JBOD (Just a Bunch Of Disks): Multiple hard disks operated as individual independent hard disk drives
– SPAN or BIG: Combines the free space on multiple hard disks on a JBOD to create a larger, spanned logical hard drive
– MAID (Massive Array of Idle Drives): Uses hundreds of thousands of hard disks primarily designed for Write Once, Read Occasionally (WORO) applications
4. Software based RAID
– Software RAID solutions are provided by many modern systems and can be implemented in a variety of ways. It is also available as proprietary software sometimes bundled with RAID hardware as an alternative to hardware-based RAID where the RAID management is performed by a RAID controller built into the RAID enclosure often offering a switch for the selection of the RAID mode preferred by the user.
A more detailed description of RAID and different RAID types is beyond the scope of this article but users are encouraged to read more about RAID storage solutions. Large storage devices are necessary in practically every modern dental practice and it is important to adopt one that will provide the necessary security and redundancy required for proper data maintenance.
The author’s workstation relies on several different RAID storage devices, some with hardware-based RAID and some with software-based RAID set-ups. All RAID devices are set to RAID 0 for maximum storage capacity, maximum read/write speeds and maximum data transfer. Here is a list of the storage used by the author in his workstation:
1. G-Technology G-Speed Shuttle XL, 8 hard disks, 32 TB capacity, hardware-based, software managed and set to RAID 0 mode (includes its own G-Speed Studio Utility application for RAID management)
2. OWC Mercury Elite, 4 hard disks, 12 TB capacity, software-based, set-up with Apple’s Disk Utility in RAID 0 mode
3. OWC Mercury Elite, 4 hard disks, 12 TB capacity, hardware-based, switch set to RAID 0 mode
4. OWC Mini 4, 4 SSD drives, 8 TB capacity, hardware-based, switch set to RAID 0 mode
5. LaCie 2big, 2 hard disks, 16 TB capacity, hardware-based, factory set to RAID 0 mode (software managed via its own included LaCie RAID Manager application)
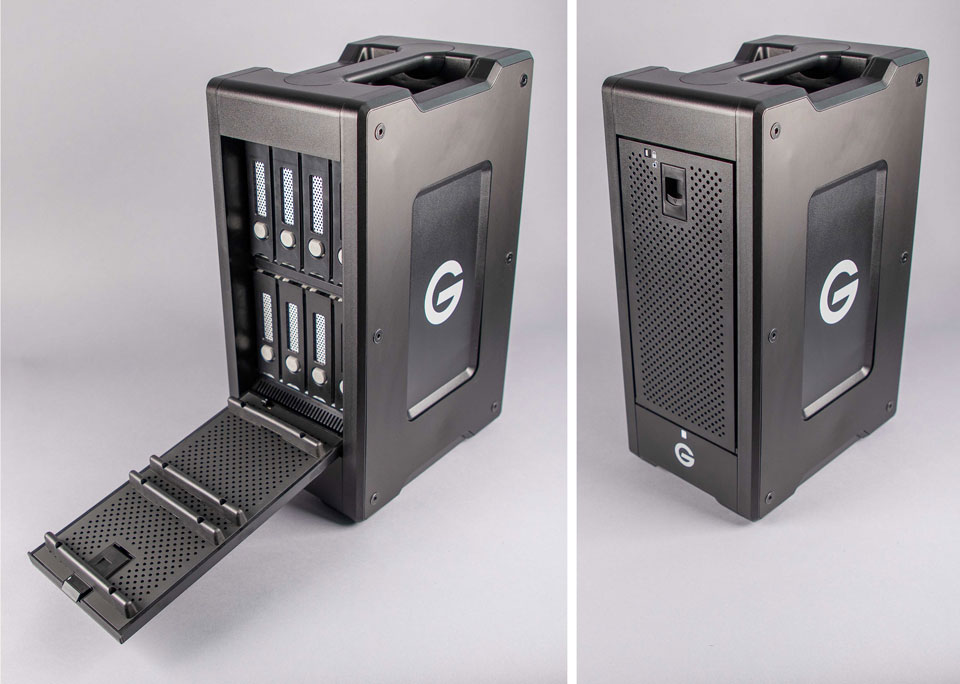
Figure 3: G-Technology G-Speed Shuttle XL 32 TB RAID Drive w/ 8 Internal Hard Disks.
One important factor to consider with RAID settings is the physical location where date resides. Even the safest nested RAID mode offers limited protection if applied to a RAID set located inside a single RAID enclosure. A major disaster such as an electrical overload or a fire can expose the entire RAID enclosure to unrepairable damage and cause catastrophic data loss. The author recommends at least one local back-up and one remote back-up.
1. Local back-up: Data is backed-up daily and is easily accessible
2. Remote back-up: Data is backed-up as frequently as possible (ideally it should be backed-up daily). The back-up can be done locally or over the Internet.
Last but not least it is important to mention a less expensive alternative to RAID systems and one that has become popular in recent years. The utilization of a hard disk dock can prove useful and simple to upgrade. Docks come with one or two hard disk slots or bays and with multiple choices of input/output ports. The author uses a dual-slot dock equipped with (1) USB 3.1 and (2) Thunderbolt 2 ports capable of receiving two hard disks simultaneously. Considering hard disks are presently available in capacities of up to 18 TB the dock has a total maximum storage capacity of 36 TB but with the flexibility of removable drives similar to Iomega’s ZIP and JAZ drives. Combined with the Macintosh’s ability to create software-based RAIDs using its Disk Utility application one could have a very inexpensive RAID drive with up to 36 TB for a reduced cost compared with ready, off-the-shelf RAID systems. The only disadvantage is the absence of an internal fan that is present in almost all RAID enclosures. The docked hard disks can reach high temperatures when in use for extended periods of time. In this case the problem can be easily solved with the use of a small external fan directed to the dock and the installed hard disks. Figure 4 shows the author’s OWC dock with two slots (3.5 inch and 2.5 inch hard disks), one USB 3.1 and two Thunderbolt 2 ports.
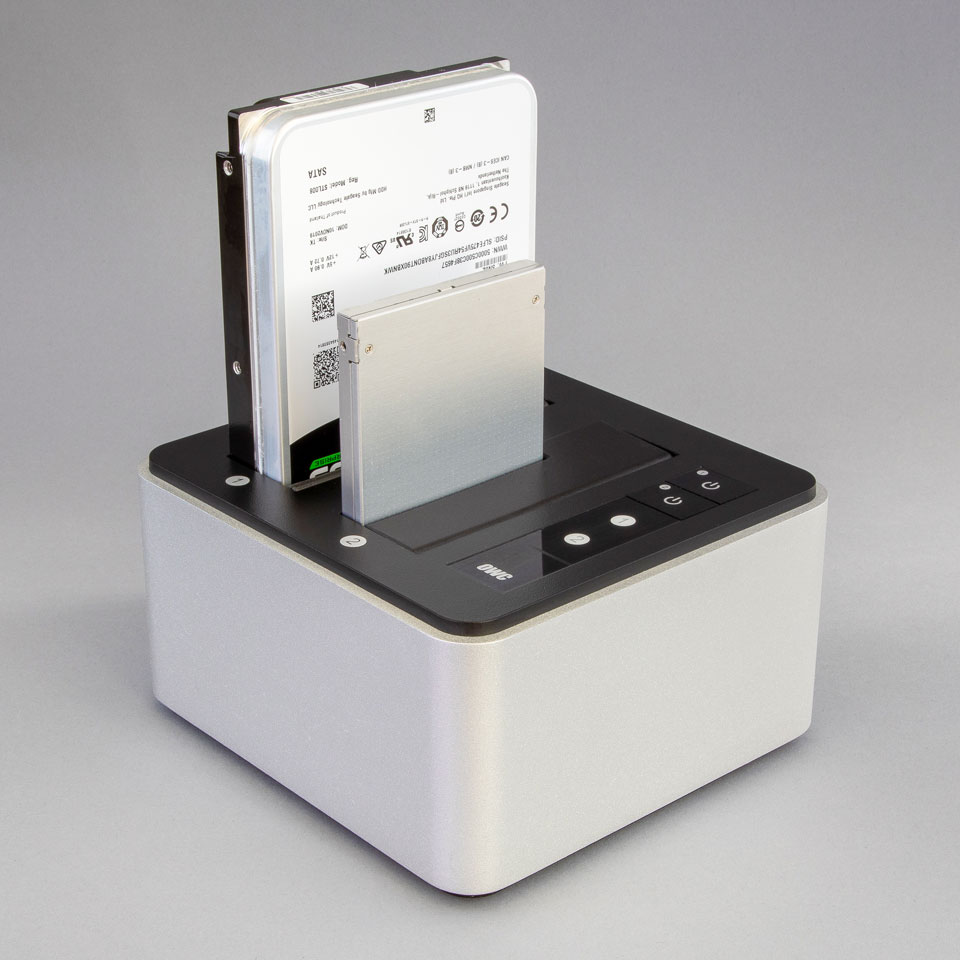
Figure 4: Other World Computing’s (OWC) DriveDoc with two disk slots (displayed here with one 3.5 inch and one 2.5 inch hard disks)
3. Input and Output Ports
It is important to understand how different ports and their connections to computer peripherals can affect data transfer. Capacity of storage devices has increased dramatically and so has the size of files generated by most applications. This is particularly true for applications that manipulate images and videos. In order to work effectively and efficiently with these applications one must ensure that files are saved and read on a timely manner and without delays. A fast and large capacity storage device can be rendered useless if not connected to the computer via a port that provides enough bandwidth to keep up with the application as it is transferring data. Below is a list of input and output ports, past and present, along with their data transfer rates. It is easy to see how their data transfer can affect overall performance.
| Port Type | Speed | Year |
|---|---|---|
| Serial RS-232 | 115 Kb/s | 1969 |
| Parallel (IEEE 1284) | 300 Kb/s | 1981 |
| SCSI | 40-320 Mb/s | 1986 |
| USB (Low Rate) | 1.5 Mb/s | 1996 |
| USB (High Rate) | 12 Mb/s | 1998 |
| Firewire 400 (IEEE 1394a) | 400 Mb/s | 2000 |
| Firewire 800 (IEEE 1394b) | 800 Mb/s | 2003 |
| USB 2 | 480 Mb/s | 2000 |
| USB 3 | 5 Gb/s | 2008 |
| USB 3.1 | 10 Gb/s | 2013 |
| e-SATA | 1.5-6 Gb/s | 2004 |
| Thunderbolt | 10 Gb/s | 2011 |
| Thunderbolt 2 | 20 Gb/s | 2013 |
| Thunderbolt 3 | 40 Gb/s | 2015 |
Table 3: Input and Output Ports With Their Respective Data Transfer Rates.
The selection of a computing platform equipped with input-output ports that provide adequate data transfer rates is a crucial aspect of this selection process. Ports with high data transfer rates will ensure files are transferred in a timely manner and without long delays. Data transfer rates is particularly important for remote photography and video so that there aren’t any interruptions, lags, or data loss. Most recent and current Apple Macintosh computer models come equipped with Thunderbolt 2 and Thunderbolt 3 input-output ports providing extremely fast data transmission and the fastest available today.
As we examine the evolution of input/output ports it is clear how much these have evolved. From the Serial RS-232 port used with the first personal computers to today’s Thunderbolt 3 port the speed of data transfer increased from 115 Kilobits/second to 40 Gigabits/second, the second being 347,826 times faster than the first. More recent in memory is the emergence of the now ubiquitous USB port introduced for the first time in 1998 on Apple’s iMac computer. Comparing the 1.5 Megabits/second data transfer of the USB interface with today’s Thunderbolt 3 at 40 Gigabits/second it’s difficult to conceive that data transfer has experienced a 26,666 increase in speed between these two relatively new standards. Most Apple Macintosh computers today come equipped with Thunderbolt 3 ports for data transfer that would seem inconceivable only 10 years ago but make it easy to transfer large files such as high quality images and video files.
SOFTWARE
The following is a list of software used by the author in his workstation that readers may find useful and pertinent to the discussion covered in this article.
- Adobe Illustrator CC
- Adobe InDesign CC
- Adobe Photoshop CC
- Duet Display Pro
- Astropad Studio
- Adobe Bridge
- Adobe Lightroom
- Adobe Premiere
- GraphicConverter for Mac
- Art Directors Toolkit

Figure 5: Primary applications used for Computer-Assisted Smile Design (Illustrator, InDesign, Photoshop, Duet Display and Astropad Studio).

Figure 6: Secondary applications used for design and image manipulation (Bridge, Lightroom, Premiere, GraphicConverter and Art Directors Toolkit).
Adobe Systems has recently switched to a different delivery model for its software 68. It has stopped selling software packages and instead adopted a subscription model giving its users the option to pay monthly or annually for the software they use. There are various options and users can subscribe to specific packages or create their own custom list of individual applications. The last release of apps sold to users was Adobe’s Creative Suite 6 (CS6) and it has been replaced by the subscription-based Adobe Creative Cloud (CC). These applications can still be purchased from a few resellers but Adobe has stopped providing support and does not guarantee compatibility with recent and future versions of Apple’s OS X operating system (or Mac OS). The top tier subscription model for the new Adobe Creative Cloud is priced at $52.99/month and gives users the ability to download and run all software available from Adobe.
METHOD
The Computer-Assisted Smile Design method consists of the following steps:
(1) Acquisition of a retracted smile photo
(2) Superimposition of the selected smile template
(3) Analysis of all the necessary changes that need to occur to hard and soft tissues
A retracted smile photo is first captured and placed on a new Adobe InDesign document (Figure 7). Next the selected smile outline is copied from the appropriate Adobe Creative Cloud Library’s panel and overlaid using the Layers tools to ensure it is above and not below the layer that contains the smile photo (Figure 8). This outline can then be manipulated in order to have it properly sized for the patient’s smile as well as to add custom modifications (Figures 9 and Fig. 10). InDesign is particularly helpful here since it presents multiple tools that simplify this process. Three of these tools – the Pencil, the Pencil Smooth and the Pencil Erase – allow modifications to be made to the contours of individual smile templates. In addition the integration between all Adobe apps allows the image to be edited in Photoshop and updated in InDesign while a link between both remains active. Smile outlines can be obtained from a variety of different sources. The author has used smile outlines from Jan Hajto’s Anteriores Template Contour Library 69, from William Dorfman’s ‘The Smile Guide’ 27 and from prosthetic dental molds. Both Jan Hajto’s Anteriores Library and William Dorfman’s ‘The Smile Guide’ have been traced, saved as Creative Cloud Libraries and are available for repeated use whenever a new smile design needs to be created. In addition to Jan Hajto’s Anteriores and William Dorfman’s ‘The Smile Guide’ the author has created a library with VITA 3D shade tabs.
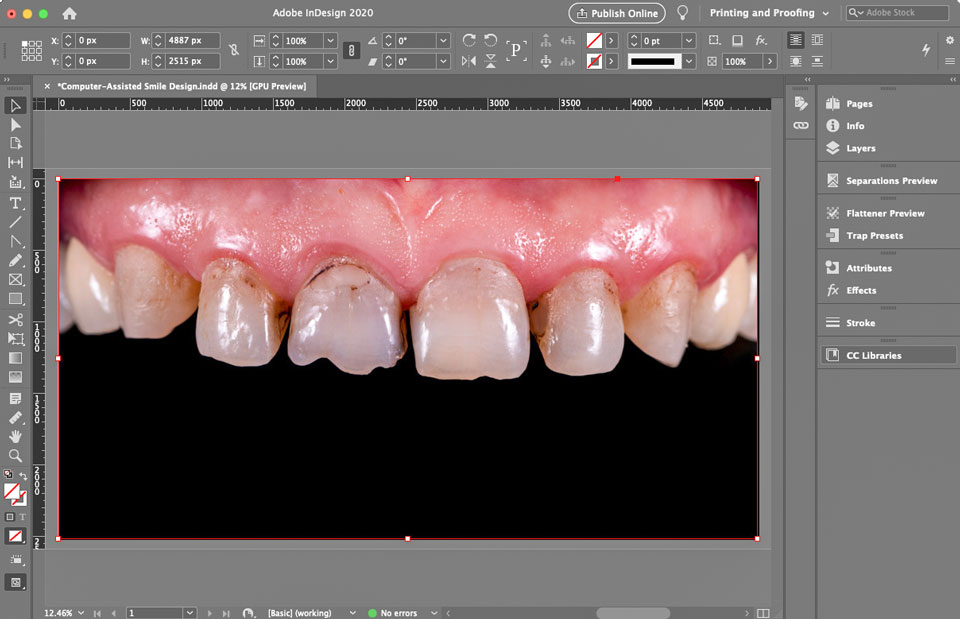
Figure 7: Adobe InDesign document with retracted smile photo added to background layer.
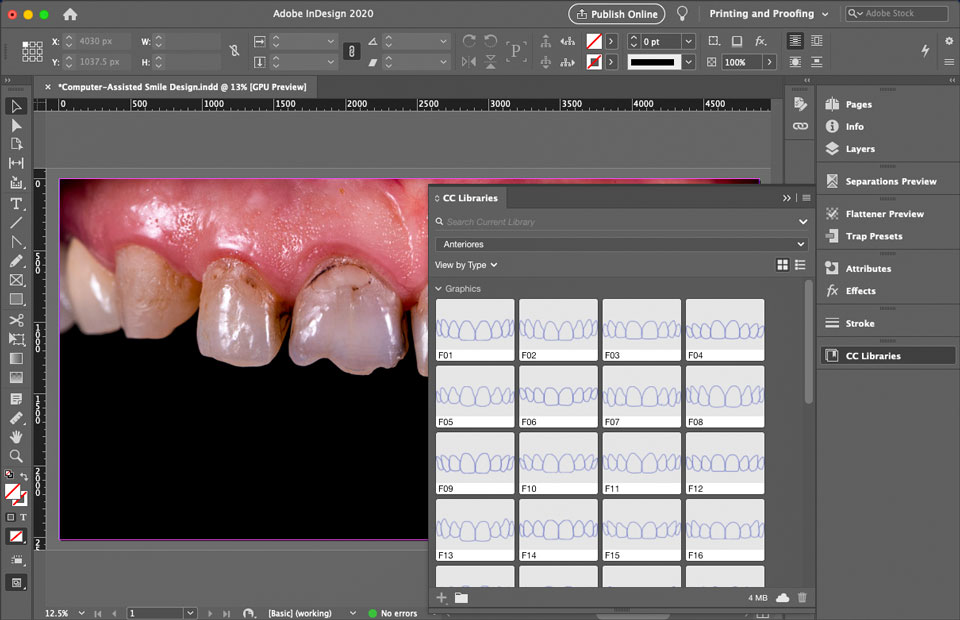
Figure 8: Selection of smile contour from one of the CC Libraries (Adobe Creative Cloud Libraries).
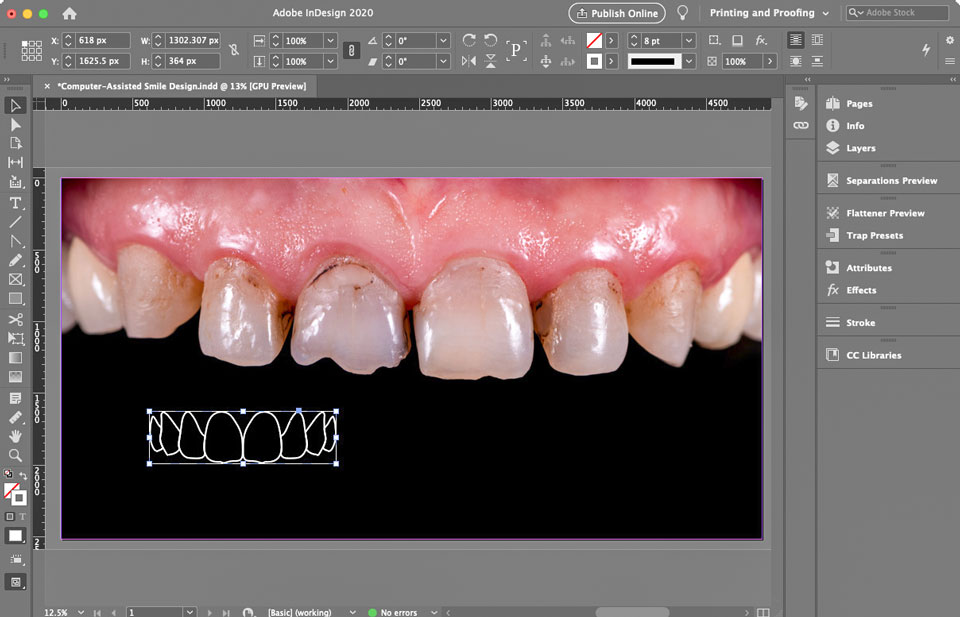
Figure 9: Placement of selected smile contour over retracted smile photo.
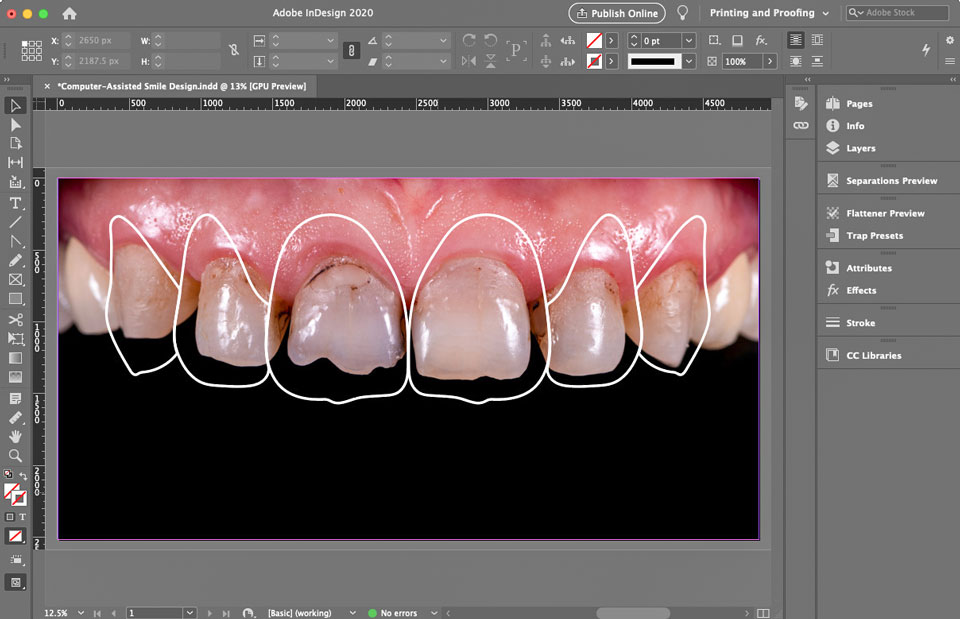
Figure 10: Smile contour is scaled and precisely positioned for desired smile design.
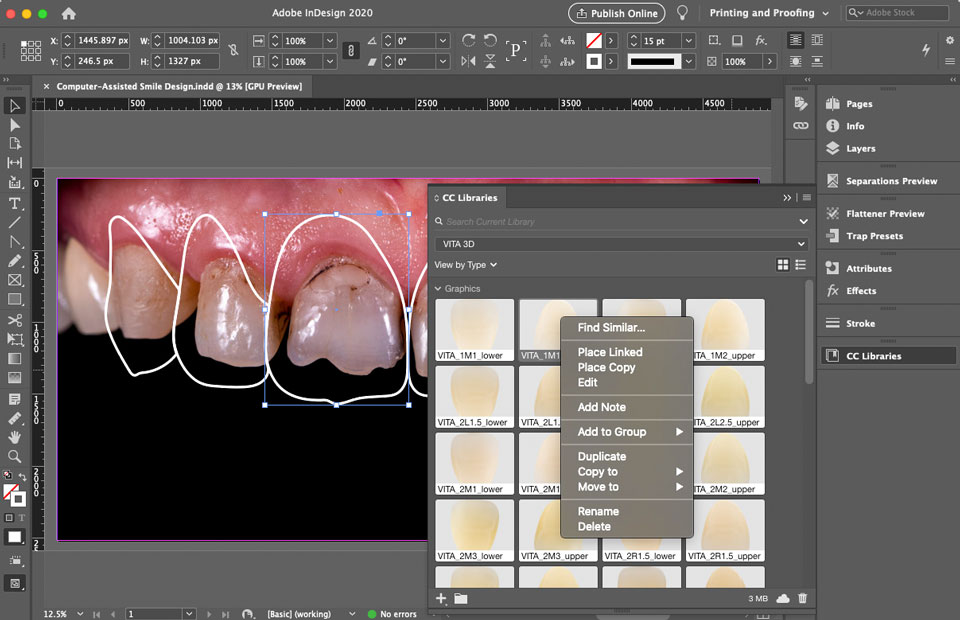
Figure 11: Shade is selected from VITA 3D CC Library and copied into individual selected tooth contour.
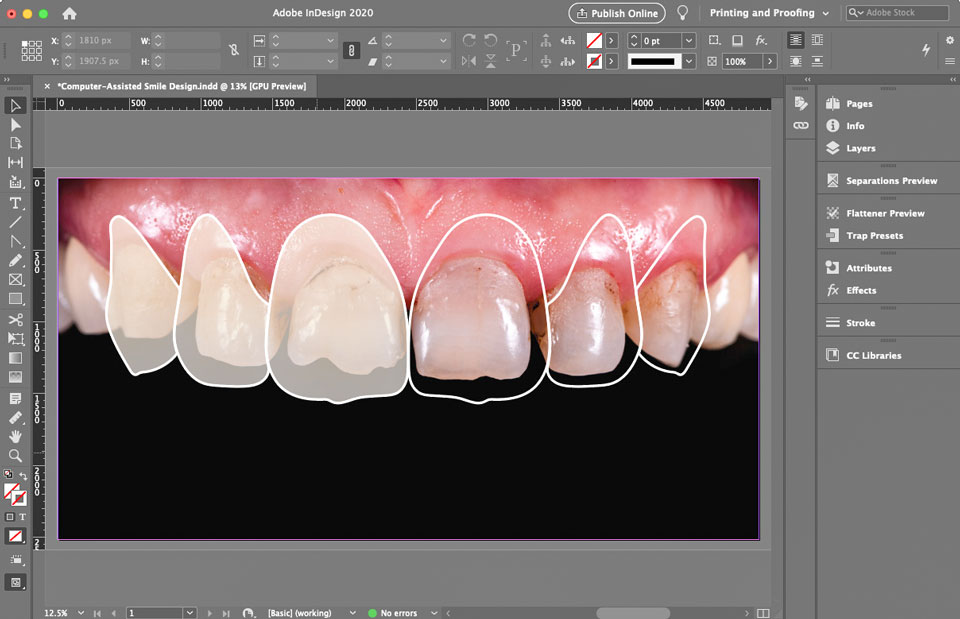
Figure 12: Individual teeth filled with selected shade and with the addition of transparency.
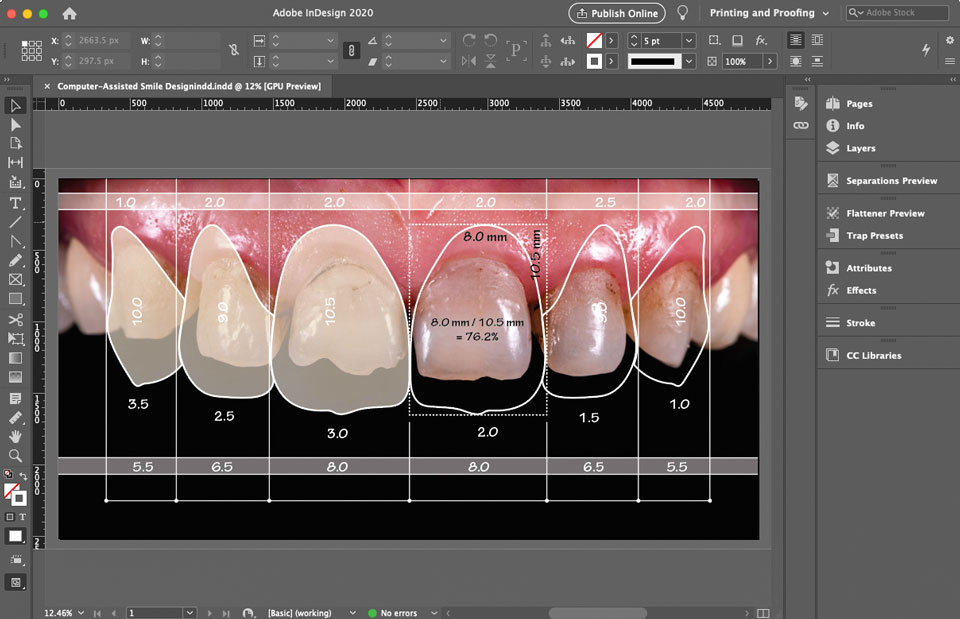
Figure 13: Measurements for alterations to tooth structure and surrounding soft tissues added to smile design.
ADOBE CREATIVE CLOUD LIBRARIES
Libraries have been offered and supported by Adobe’s InDesign software for some time. Initially available as Adobe InDesign Libraries with files stored locally these libraries evolved to cloud-based libraries accessible by users from browsers (by logging in on user’s Adobe account) and most Adobe applications with InDesign, Photoshop and Illustrator as the most important ones. These libraries have been created to allow users to manage and utilize digital assets needed repetitively. After the introduction of Adobe’s Creative Cloud subscription model the company began to offer a new variation of Libraries named Creative Cloud Libraries or CC Libraries. They are composed of assets stored in the user’s Creative Cloud account and made available to all Adobe applications that support it. A list of applications that support CC Libraries includes (1) InDesign CC, (2) Illustrator CC, (3) Photoshop CC, (4) Bridge CC, (5) Lightroom CC and (6) Premiere CC, among others. The idea is that users can create digital assets, save them to the cloud using CC Libraries and then have these assets easily accessible so they can be used again and with a variety of Adobe applications.
Creative Cloud Libraries are used in our Computer-Assisted Smile Design protocol as a repository for smile design templates, dental proportion rulers or guides, and shade tabs used to fill smile outlines. Once created these Libraries are saved and become available every time users wish to design a new smile or work on a new treatment plan. These assets can also be shared with others and accessed on the user’s Creative Cloud page on Adobe’s website using a web browser. Each individual CC Library can be made private or shared with others.
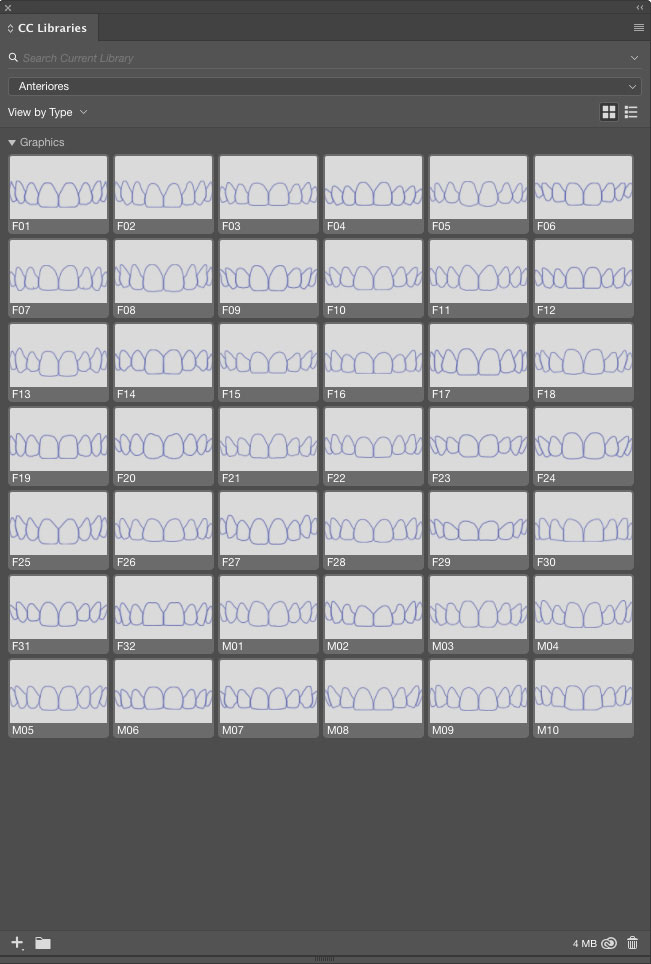
Figure 14: Adobe’s CC Libraries Panel displaying Jan Hajto’s Anteriores Library.
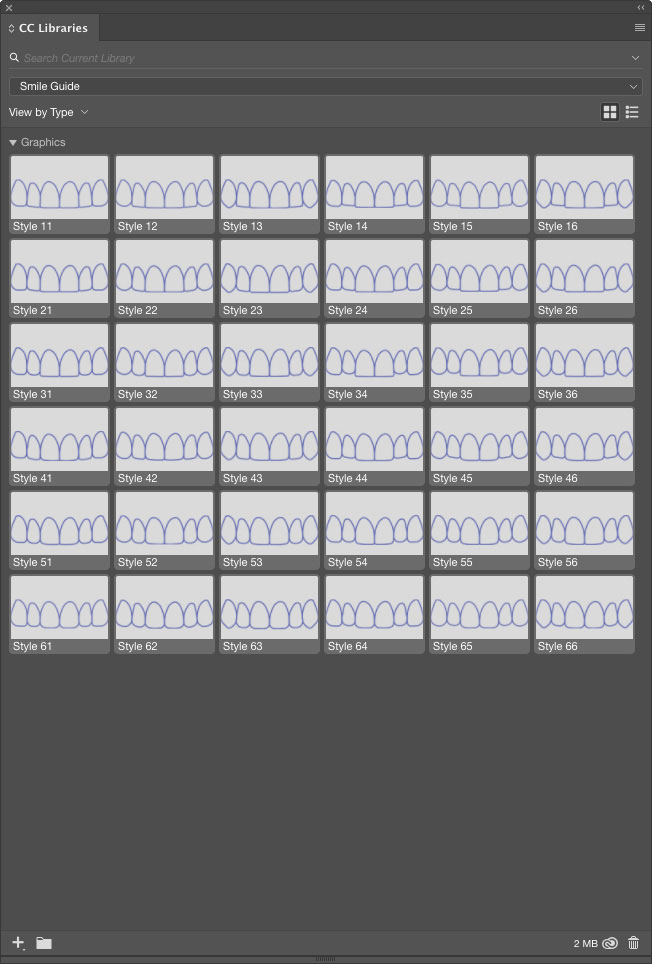
Figure 15: Adobe’s CC Libraries Panel displaying William Dorfman’s ‘The Smile Guide’ Library.
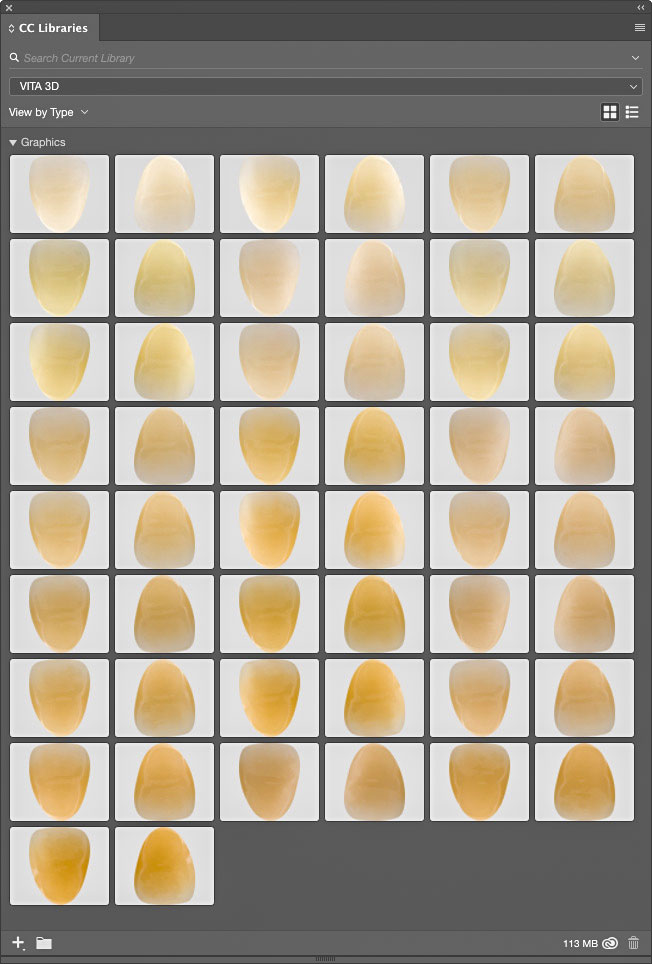
Figure 16: Adobe’s CC Libraries Panel displaying VITA 3D Shade Tabs.
ASTROPAD, DUET, APPLE SIDECAR – THE iPAD AS DRAWING TABLET
In order to create a library of smile outlines or contours one must either purchase these outlines as pre-existing computer files or trace available printed outlines. A mouse can be used for this task but the use of a drawing tablet and a pen (stylus) are highly recommended. Pens and tablets feel more natural and produce results that are far more precise than those that can be obtained using a generic mouse. One manufacturer stands out for its pioneering efforts in the design and manufacturing of computer tablets. Wacom, the largest and most recognized company behind computer tablets, offers multiple product lines ranging from small and simple devices all the way to larger, monitor-sized, LCD-based drawing devices where users draw on top of the very image on which they are currently working.
An alternative to the use of digitizing tablets is the use of an iPad (the larger 12.9 inch iPad Pro is highly recommended). This can be accomplished with the use of specific software that changes the iPad’s behavior so that it can be used as a drawing tablet and second computer monitor or more recently with Apple’s new Sidecar technology. Sidecar allows an iPad to be connected to a Macintosh computer and used as an external secondary monitor and tablet. In addition to Apple’s own Sidecar technology two third party applications, (1) Duet Display Pro 70 and (2) Astropad Studio 71, allow the Macintosh to connect to an iPad and use it as an external monitor and tablet. Both offer an application for Mac OS X and the main application installed on the iPad. The major difference between both applications is the Astropad Studio’s ability to work only in mirror mode. The iPad won’t work as a true independent second monitor but rather as a mirror of the first monitor. As of the writing of this article Astropad announced a dongle device similar in shape and size to a USB flash drive (also known as a thumb drive) the company claims will allow both the Macintosh computer and the iPad to be connected wirelessly but without the performance issues and image lag that were typical of their previous attempts at wireless connectivity. Astropad’s new hardware companion, the dongle device named ‘Luna’, is designed to allow faster wireless connection between iPad and Macintosh in addition to turning the iPad into a true second monitor.
Duet is available in the standard, less expensive version and the Duet Pro, which is the version we recommend. Duet Pro offers faster performance and rendering, drawing tools, pressure sensitivity and several improvements over the standard version that makes it suitable for our task. While running Duet Pro the iPad must be tethered since the application doesn’t support wireless connectivity.
Astropad, just like Duet, is available in two versions: Astropad and Astropad Studio. Astropad, unlike Duet Display, can’t work as a true second monitor and can only mirror the Macintosh’s screen. Astropad’s major advertised advantage over Duet is the ability to have the iPad connected wirelessly. The user can work untethered and experience greater freedom and comfort. In tests performed by the author Astropad’s performance in wireless mode proved insufficient to allow drawing of smile outlines to be done with reasonable speed and reliability.
The author found Duet Pro tethered via USB-Lightning cable and in mirror mode to be the best option to trace smile outlines due to its fast performance and fluid behavior, without any lag between the image drawn on the iPad’s screen and that displayed on the Macintosh’s screen. The iPad Pro was connected to the Macintosh via a regular USB-Lightning cable, Duet Pro was launched, the iPad displayed a mirror image of the Macintosh’s monitor and Illustrator was used to trace smile outlines to be saved to Adobe Creative Cloud Libraries. Figure 17 below shows the Macintosh screen mirrored on the iPad Pro 12.9 inch screen with Adobe Illustrator used to trace the image of an anterior smile contour from William Dorfman’s ‘The Smile Guide’.
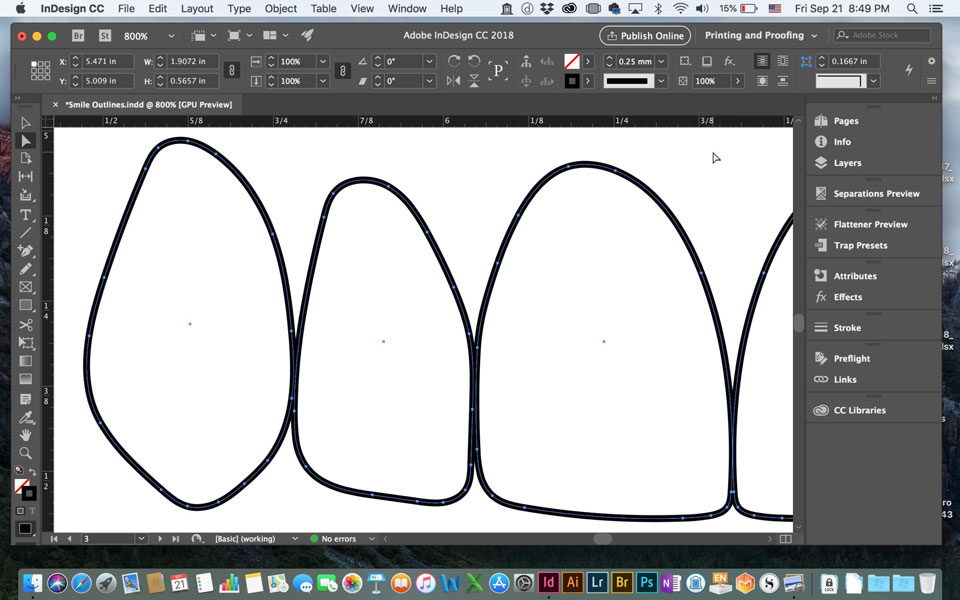
Figure 17: Duet Pro on iPad Pro 12.9 inch to trace different dental contours.
In order to create the smile outline libraries listed above, each outline was traced using an iPad Pro 12.9 inch and an Apple Pencil used as a digital tablet while running the Duet Display Pro application. Drawings of each of the smile outlines were imported into the Adobe Illustrator application, traced with the iPad and Apple Pencil, copied, pasted into InDesign, and then added to the proper Creative Cloud Library.
Jan Hajto’s Anteriores Smile Contour Library is available as digital files for both Apple’s Keynote and Microsoft’s Powerpoint but not for Adobe’s InDesign. According to Adobe a conversion tool isn’t available at this time to allow the conversion of smile contour files for Keynote or Powerpoint files into a file format that can be imported into InDesign. A third party conversion application may be available but the author is not aware of one at this time. In order to create smile contours in a format that could be used in InDesign the author exported each file from Keynote, opened the file and traced the image in Adobe Illustrator, and saved it to the Anteriores Creative Cloud Library. William Dorfman’s ‘The Smile Guide’ is available only in printed form. The author scanned each individual smile template and traced it using a similar approach to the one described above for Jan Hajto’s Anteriores Smile Contour Template Library.
TEMPLATES
Most if not all smile design protocols in existence today rely on the use of templates from which new smile outlines are created. Some have questioned and criticized the use of these templates based on the argument that smiles are unique just like signatures and shouldn’t be the product of a template-based, cookie-cutter approach. However compelling this argument may seem it goes against our knowledge of how all living things are created. Every living organism follows a template and humans aren’t different. Every human subject is expected to have a body outline that includes two upper limbs (arms), two lower limbs (legs), one head (with neck) and one trunk. This is the template for every member of the Homo Sapiens species. There are variations in size, shape, color, texture and other aspects of the structures that compose each human and these variations serve to give each sample its own individual quality, its own identity, its own unique nature. However, they all follow this expected template. Minor variations within this template provide identity while major variations can be seen as an undesirable and abnormal departure from this template. In case an individual presents only one lower limb (or one leg) this is no longer perceived as a minor individual variation but rather as a defect caused by the failed expression of the genetic information to develop a healthy and normal individual. Even the very structure responsible for giving us our unique features – our DNA – follows a template. Although the bases vary to create unique combinations that express our genetically-inherited and genetically-transferred characteristics the DNA structure 72 follows a template described by its double helix structure that never varies.
” Some have questioned and criticized the use of templates based on the argument that smiles are as unique as signatures and shouldn’t be the product of a template-based, cookie-cutter approach. However compelling this argument may seem it goes against our knowledge of how all living things are created. Every living organism follows a template and humans aren’t different. “
Templates also exist in the oral environment. A canine has a certain specific and expected anatomy. It is expected to present a single cusp tip and its characteristic robust crown with its typical ‘pointy’ anatomy. This is the ‘template’ for all canines despite variations that exist between individuals. The same applies to each and every tooth in the oral cavity. Templates can be described as the overall contour and outline each structure and/or living organism is expected to present. The variations within these templates displayed by each individual can be seen as their unique implementation of these templates.
There are numerous ways to introduce templates into any smile design protocol. Independent of the template employed in the design process it should be seen as the initial step and followed by an augmentation process focused on ‘adapting’ this template to the specific and individual needs of each patient. In other words a template should be used to establish the initial proposed outline and it should then be refined to create a patient-specific design that matches the patient’s physical and psychological/behavioral characteristics.
Templates can be created in a variety of different ways. One can draw their preferred smile design and create a template from scratch. A tooth mold from a set of dental prosthetic teeth can also be used. Prosthetic teeth have evolved to offer proportions most people find quite acceptable and even attractive. Another choice is to trace these templates from existing smile images and transform them into curves that can be imported into the design application. The concept of a donor smile has emerged in recent years to describe the use of a smile from a person the patient finds attractive as a reference and use it as a template. Last but not least smile templates can also be purchased from available sources such as Jan Hajto’s Anteriores Templates Contour Library and William Dorfman’s ‘The Smile Guide’.
TRANSFER OF DESIGNS TO MODELS
Designs must be transferred to dental models in order to transition from the 2D space of computer monitors and the paper prints to the 3D space of human anatomy. For a smile design or treatment planning protocol to be successful a simple solution must be used to promote this transfer. For this task the author prints the selected smile design template over a template of Panadent’s Waxing Guide for its Kois Adjustable Platform model mounting jig. Panadent’s Waxing Guides are available in Standard (without any guides or lines other than the midline) and Golden Proportion design. The Golden Proportion Waxing Guides present guiding lines observing the Golden Proportion for maxillary central incisors with widths of 7.0 mm, 7.5 mm, 8.0 mm, 8.5 mm, 9.0 mm, 9.5 mm and 10 mm. The printed template is attached to the Kois Adjustable Platform and a maxillary diagnostic wax-up is created based on the template.
In order to transfer the design from the computer screen to the model one has numerous options. The author has created an Adobe InDesign template that can be used with the Panadent semi-adjustable articulator and the Kois Adjustable Platform. The template is printed (Figure 20), placed over a standard waxing guide (Figure 19) and attached to the Kois Adjustable Platform (Figure 21). The diagnostic wax-up of the smile (Figure 22, Figure 23) is then created by following the lines and ensuring each tooth will follow the proportion assigned on the screen by the smile design.
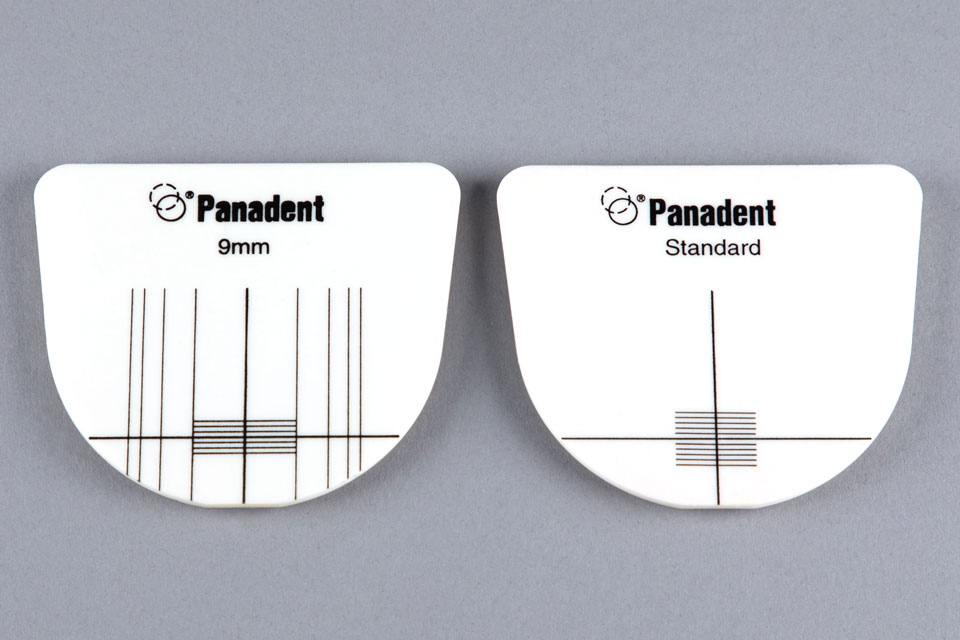
Figure 18: Golden Proportion (left) and Standard (right) Waxing Guides.
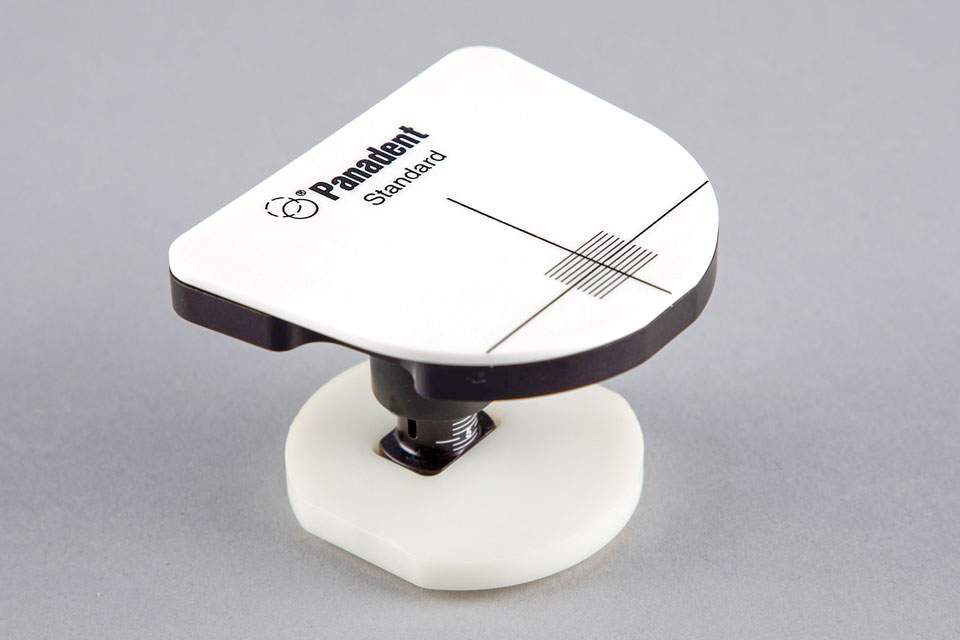
Figure 19: Standard Waxing Guide on Kois Adjustable Platform.
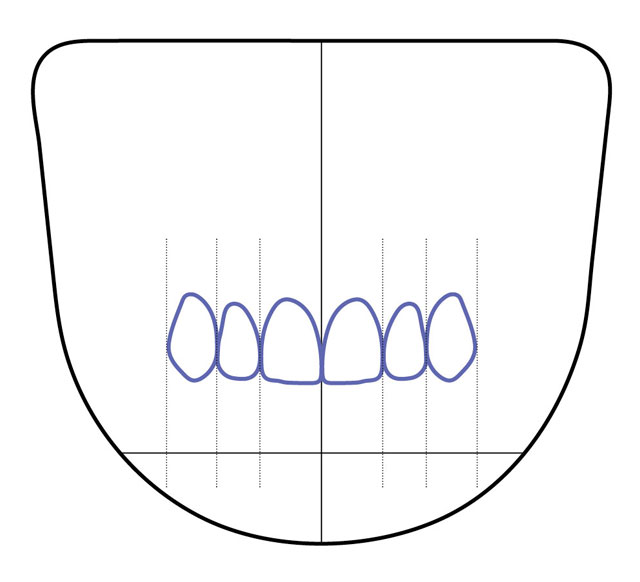
Figure 20: Printed custom template to be used for diagnostic wax-up.
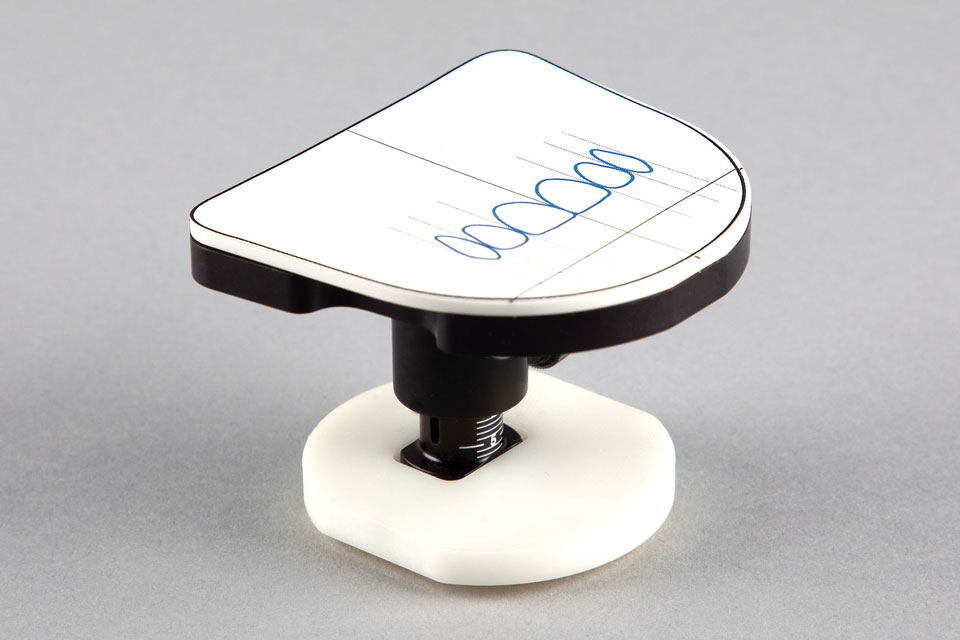
Figure 21: Custom template and Standard Waxing Guide mounted on Kois Adjustable Platform.
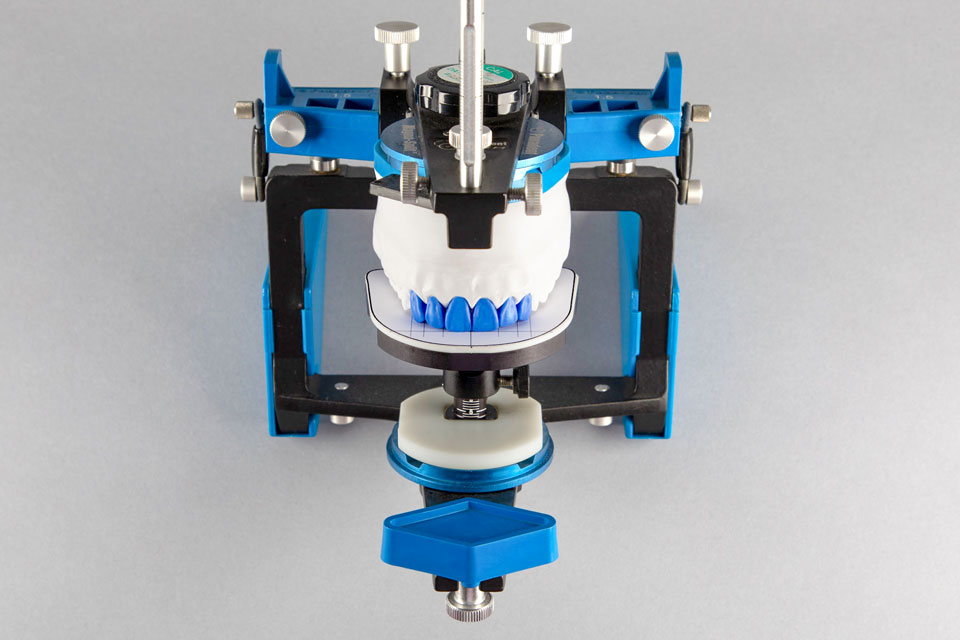
Figure 22: Diagnostic wax-up on Panadent Semi-Adjustable articulator (front view).
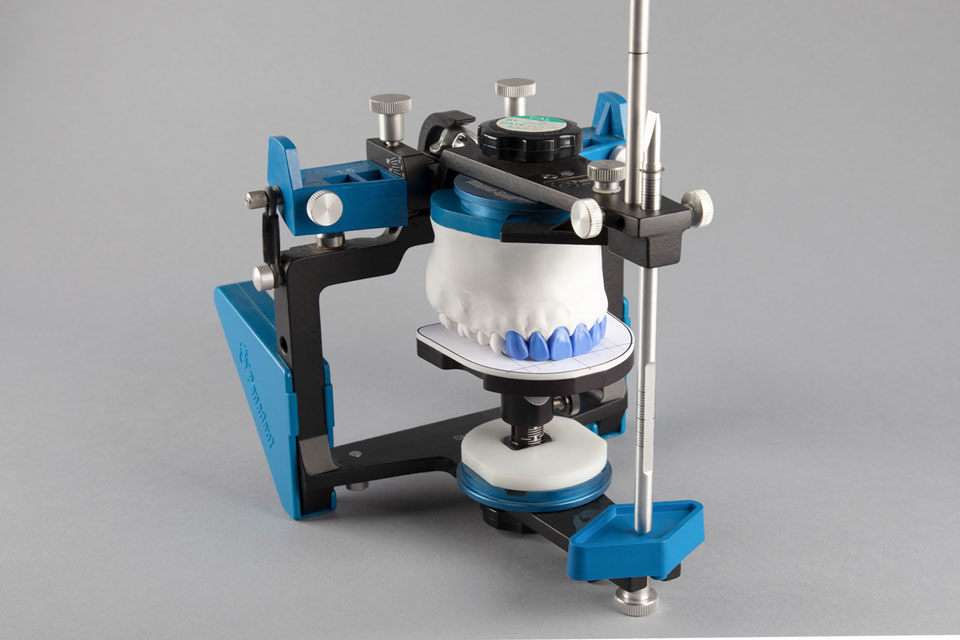
Figure 23: Diagnostic wax-up mounted on Panadent Semi-Adjustable articulator (side view).
FUTURE PERSPECTIVES: COMPUTER-ASSISTED SMILE DESIGN AS A NEW STANDARD
Available implementations of the Computer-Assisted Smile Design concept are presently offered as continuing education training to professionals who have already finished dental school.
This concept should be viewed as a new approach to patient examination, treatment planning and treatment presentation that can change the way dentistry is offered to patients. Its integration to routine clinical procedures should change the practice of dentistry and the way dental exams are performed. In order to become the de facto standard it needs to be introduced to academic institutions and become part of the graduation curricula of dental schools.
The Computer-Assisted Smile Design concept in all its variations holds potential to become a universal tool utilized by dentists as a standard element of every dental exam.
DISCUSSION
Despite its appealing nature the introduction of new technology in Dentistry isn’t an easy process. In addition to the challenges imposed by learning and implementing new technology there is also the cost associated with this change. The last decade or two have brought waves of new technology to all areas of healthcare and dentistry is not an exception. These waves have resulted in a dramatic increase in the cost to set-up and maintain a typical dental practice. This coupled with patients’ ever-growing dependency on dental insurance and lower reimbursement to dental professionals by insurance companies have made it more difficult for professionals to keep up with changes while avoiding excessive expenses. The author offers an alternative smile design protocol that can be simpler and more cost-effective to the average clinician in order to improve treatment planning and work with better tools for treatment presentation. The system presented here may be implemented for as little as $52.99 per month, which is Adobe’s current subscription price for users to have access to all their software via their Creative Cloud package.
Emerging technologies have the opportunity to transform Smile Designs into a fully automated process. Vertical market computer applications should allow clinicians to perform Smile Designs and have them fabricated in their own office using CAD-CAM technology with devices that include milling machines (subtractive manufacturing process) and 3D printers (additive manufacturing process). A snap-on overlay of the designed smile can be made instantly available and presented to the patient as part of the routine dental exam. In order for this technology to become mainstream it is important that it be made accessible and easy to implement in terms of ease of integration as well as cost.
LINKS AND INFORMATION
Adobe Systems – www.adobe.com (InDesign, Photoshop, Illustrator, Lightroom, Bridge and Premiere software)
Anthro/Ergotron – www.ergotron.com (Anthrobench II, Computer desks and office/computer furniture)
APC – www.apc.com (Back-UPS XS 1500 power back-up, other UPS Uninterruptible Power Supplies)
Apple Inc. –www.apple.com (Mac Pro, Macbook Pro, iPad Pro, External Superdrive, Apple Pencil, Apple Keyboard and Trackpad)
Astropad – www.astropad.com (Astropad Standard and Astropad Studio software, LunaDisplay wireless iPad connection)
Canon – www.canonusa.com (EOS 5D Mk IV DSLR camera, 100 mm macro lens, MR-14EX II Ringlite macro flash, Accessories)
Code Line – www.code-line.com (Art Directors Toolkit software)
Contour Design – www.contourdesign.com (ShuttleXpress shuttle and jog wheel controller)
Dell Technologies – www.dell.com (Dell P4317Q 43 inch 4K monitor)
Duet Display – www.duetdisplay.com (Duet and Duet Pro software)
G-Technology (part of Western Digital) – www.g-technology.com (G-Speed Shuttle XL 32 TB RAID external drive)
Gitzo – www.gitzo.com (Carbon Fiber tripods, Tripod heads)
Jan Hajto Anteriores – www.anteriores.de (Anteriores Template Contour Library)
Kerr/Belle De St. Claire – www.kerrdental.com (Ultra-Waxer 2 and tips, Smoothy Flameless Wax Finisher)
Kirk Photo – www.kirkphoto.com (Macro Bracket, Macro Rails and Accessories)
LaCie – www.lacie.com (BDXL d2 Blu-Ray Read/Write Drive, 2big 16 TB RAID External Drive)
Lemke Soft – www.lemkesoft.com (GraphicConverter for Mac software)
Loupedeck – www.loupedeck.com (Adobe Lightroom keyboard, Loupedeck CT programable controls)
Manfrotto – www.manfrotto.com (Tripods, Tripod Heads, Monopods, Studio Lighting Gear and accessories)
Monogram – www.monogramcc.com (Monogram programable controls)
NIK Collection – www.nikcollection.dxo.com (NIK collection of image editing software)
Other World Computing – www.macsales.com (OWC RAID Hard Drives, OWC RAID SSD Drive, OWC Drive Dock)
Palette Gear – www.palettegear.com (Palette Gear programable controls)
Panadent – www.panadent.com (Semi-Adjustable Articulator, Magnetic Mounting Plate, Kois Facebow, Kois Mounting Platform)
Pioneer Electronics – www.pioneerelectronics.com (BDR-XS07S Blu-Ray slot loading portable drive)
Profoto – www.profoto.com (D2 Monolight, B2 OCF Flash Kit, Studio Strobes and Light Shaping Tools)
Really Right Stuff – www.reallyrightstuff.com (Carbon Fiber and Aluminum Tripods, Tripod Heads, Macro Bracket, Rails)
Renfert – www.renfert.com (GEO Expert Functional modeling waxes)
Tripp Lite – www.tripplite.com (TLP76MSG 7-Outlet Individually Controlled Surge Protector/Power Strip)
ABOUT THE AUTHOR
The author has a background in computer and architectural design, and has worked with both generic applications such as AutoCAD and vertical market applications such as ArchiCAD. He is familiar with the Macintosh workstation and has been a Mac user since the inception of this computing platform. The author has also worked with Sun Microsystems and Silicon Graphics UNIX workstations, both widely used in the past by the movie industry in movie editing, animation and special effects. He practices dentistry in Los Angeles, California with a practice focused on General and Esthetic Dentistry, Implant Dentistry and Oral Rehabilitation.
DISCLOSURES
The author has not received any form of compensation or sponsorship from manufacturers of products recommended or otherwise mentioned in this article.
BIBLIOGRAPHY
01. Avery DR. Mosby’s Dental Dictionary, 3rd Ed. Elsevier Mosby, 2014.
02. Oxford Dictionary of English, 3rd Ed. Oxford University Press, 2015.
03. Webster’s Third New International Dictionary Unabridged, 3rd Ed. Merriam-Webster Inc., 2008.
04. Ross DT. Computer-Aided Design: A Statement of Objectives, MIT USAF 8436-TM-4, 17 March 1961.
05. U.S. Congress, Office of Technology Assessment. Computerized Manufacturing Automation. DIANE Publishing, 1984:48.
06. Daintith J. A Dictionary of Computing, 5th Ed. Oxford University Press, 2004:102.
07. Pichler F, Moreno-Diaz R. Computer Aided Systems Theory. Springer, 1992:602.
08. Morley J. Smile Designer’s Workshop. Dent Today, 1990.
09. Feigenbaum NL. Aspects of Aesthetic Smile Design. Pract Periodontics Aesthet Dent, 1991;3:9-13.
10. Feigenbaum NL. The Challenge of Cost Restrictions in Smile Design. Prac Periodontics Aesthet Dent, 1991;6:41-44.
11. Nixon RL. Smile Showcase – Redesigning the Narrow Smile. Pract Periodontics Aesthet Dent, 1991;4:45-50.
12. Golub-Evans J. Unity and Variety: Essential Ingredients of a Smile Design. Curr Opin Cosmet Dent, 1991:1-5.
13. Messing MG. Smile Architecture: Beyond Smile Design. Dent Today, 1995;5:76-79.
14. Dorfman WM. How to Design Smile Styles for Cosmetic Dentistry. Dent Today, 1995;10:68-69.
15. Chalifoux PR. Perception Esthetics: Factors that Affect Smile Design. J Esthet Dent, 1996;4:189-192.
16. Morley J. Smile Design Terminology. Dent Today, 1996;6:70.
17. Gilmore SL. Smile Design and Esthetic Treatment Planning. J Colo Dent Assoc, 1997;1:20-23.
18. Morley J. Smile Design – Specific Considerations. J Calif Dent Assoc, 1997;9:633-637.
19. Ward DH. Proportional Smile Design Using the Recurring Esthetic Dental (RED) Proportion. Dent Clin North Am, 2001;1:143-154.
20. Morley J, Eubank J. Macroesthetic Elements of Smile Design. J Am Dent Assoc, 20011:39-45.
21. Berland L, et al. The Aesthetic Edge. A New Approach to Smile Design. Dent Today, 2003;2:70-73.
22. Snow S. Strategies for Successful Esthetic Dental Treatment. J Calif Dent Assoc, 2007;7:475-484.
23. Donitza A. Creating the Perfect Smile: Prosthetic Considerations and Procedures for Optimal Dentofacial Esthetics. J Calif Dent Assoc, 2008;5:335-342.
24. LeSage B. Approaches to Smile Design. AACD Journal of Cosmetic Dentistry, 2012;1:126-147.
25. Ward DH. Proportional Smile Design: Using the Recurring Esthetic Dental Proportion to Correlate the Widths and Lengths of the Maxillary Anterior Teeth with the Size of the Face. Dent Clin North Am, 2015;3:623-638.
26. Coachman C, Calamita M. Digital Smile Design: A Tool for Treatment Planning and Communication in Esthetic Dentistry. Quintessence of Dental Technology, 2012:103-111.
27. Dorfman WM, Dossetter DS. The Smile Guide: A Reference of Smile Styles for Patients, Dentists and Dental Technicians. Discus Dental, 1990.
28. MDM Master Diagnostic Model: A Multi-Dimensional Tool for Case Success, VHS Tape. Valley Dental Arts, 2000.
29. Petrungaro P, Maragos C, Mathiesen OH. Using the Master Diagnostic Model to Enhance Restorative Success in Implant Treatment. Compend Contin Educ Dent, 2000;1:33-44.
30. Mathiesen OH. Master Diagnostic Model for Teeth. International Patent Application #PTC/US97/16387, Valley Dental Arts, 16 Sept 1997.
31. Golub JE. Means and Methods for Dental Restoration. United States Patent #4,973,251, 27 Nov 1990.
32. Kalco System, Sistema Per La Riproduzione Delle Labbra (Kalco System for the Reproduction of Lips), Product Information Booklet. Zhermack, 1998.
33. Rifkin L, Materdomini D. Facial/Lip Reproduction System for Anterior Restorations. Journal of Esthetic Dentistry, 1993;3:127-131.
34. SmileArt Smile Simulation Service.
35. Lorin Library Smile Style Guide (https://www.digident.com/LorinLibrary.html)
36. The Ladder Dental Characterization Guide (https://4theladder.com)
37. DentMat’s LumiSmile Simulation Service (https://www.denmat.com/memberships/lumismile-design-program)
38. SNAP Cosmetic Simulation Software (http://www.snapdental.com)
39. Panadent’s 4350 DP Clear Tooth Guide (https://panadent.com/Catalog/L-PC-REV-9-Dental-Products.pdf)
40. Panadent’s 4500 DP Smile Now Starter Kit (https://panadent.com/Catalog/L-PC-REV-9-Dental-Products.pdf)
41. PreVu Cosmetic Simulation and Smile Design Software (https://prevudental.com)
42. Smile-Vision Cosmetic Imaging (https://smilevision.com/cosmetic-imaging/)
43. SmileSIM (https://www.smilesimdmd.com)
44. Digital Smile System DSS3 (https://aboutsoft.org/digital-smile-system/)
45. Henriques FQ. Planejamento Digital do Sorriso (PDS). In: Napoleão A. Clinical Cases. Restaurações Adesivas Cerâmicas. Uma Visão Clínica. Editora Napoleão, 2014:190-222.
46. Henriques FQ. PDS – Planejamento Digital do Sorriso. Personal Communications, 2015.
47. Phibo’s Smile 5D iPad Smile Design App (www.phibo.com)
48. Planmeca’s Romexis Smile Design (https://www.planmeca.com/software/software-modules/planmeca-romexis-smile-design/)
49. Smylist Aesthetic Design Software (https://smylistglobal.com)
50. Smile Designer Pro software (https://www.smiledesignerpro.com)
51. CEREC Smile Design 4.5 (www.dentsplysirona.com/en-us/categories/cerec.html)
52. VisagiSMile (www.visagismile.com)
53. McLaren EA, Garber DA, Figueira J. The Photoshop Smile Design Technique (Part 1): Digital Dental Photography. Compendium, 2013;10:772-779.
54. McLaren EA, Culp L. Smile Analysis – The Photoshop Smile Design Technique: Part 1. Journal of Cosmetic Dentistry, 2013;1:94-108.
55. Culp L, McLaren EA, Swann LC. Smile Analysis – Converting Digital Designs to the Final Smile: Part 2. Journal of Cosmetic Dentistry, 2013;2:98-108.
56. Memory and Imagination: New Pathways to the Library of Congress, Documentary Video, Steve Jobs Interview, 1990.
57. Negus C. Mac OS X UNIX Toolbox: 1000+ Commands for the Mac OS X. Wiley, 2009.
58. McElhearn K. The Mac OS X Command Line: UNIX Under the Hood. Wiley, 2005.
59. Taylor D. Learning UNIX for OS X: Going Deep with the Terminal and Shell, 2nd Ed. O’Reilly, 2016.
60. Sobell MG, Seebach P. A Practical Guide to UNIX for Mac OS X Users. Prentice Hall, 2005.
61. Cohen O. Mac OS X, BSD UNIX Top Security Survey. Macworld Magazine, 2004.
62. Haslam K. Mac vs. PC. Macworld UK, 2019 (https://www.macworld.co.uk/feature/mac-vs-pc-3493363/)
63. Thomas JA. Elements of Information Theory, 2nd Ed. Wiley, 2006.
64. Wescott B. Every Computer Performance Book. CreateSpace, 2013.
65. Harchol-Balter M. Performance Modeling and Design of Computer Systems. Cambridge University Press, 2013.
66. Verger R. Intel’s New Chip Puts a Teraflop in Your Desktop. Here’s What That Means. Popular Science, 2017 (https://www.popsci.com/intel-teraflop-chip/)
67. Amazon S3 Pricing, Cloud Storage. Amazon, 2021 (https://aws.amazon.com/s3/pricing/)
68. Adobe Creative Cloud Plans & Pricing. Adobe Systems, 2021 (https://www.adobe.com/creativecloud/plans.html)
69. Hajto J. Anteriores Templates Contour Library. BTVI Marketing Consultants and Dr. Jan Hajto, 2021 (www.anteriores.de)
70. Duet Display Pro. Duet Inc, 2021 (www.duetdisplay.com)
71. Astropad Studio. Astropad, 2021 (www.astropad.com)
72. Watson JD, Crick FHC. A Structure for Deoxyribose Nucleic Acid. Nature, 1953:737-738.